Tracks 7 - 10 in the Arrange window all use the Ultrabeat plug-in. We'll only cover the basic features of Ultrabeat in this lab. We'll start with track 8. Everything we cover will apply to tracks seven, nine and ten as well.
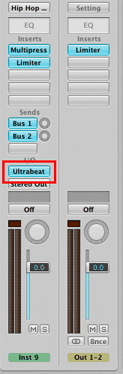
Select track 8 "Hip Hop Tech Kit" in the Track list.
Click the Ultrabeat button in the Inspector panel.
You should see the window for the Ultrabeat drum machine opened to the "Hip Hop Tech Kit" patch.
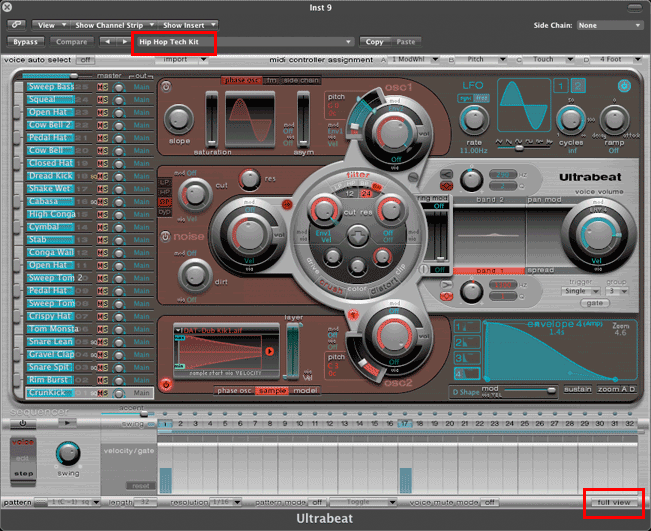
There are two interface views to Ultrabeat. The picture above is the Edit view.
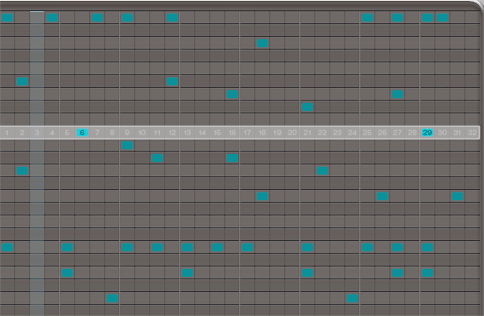
Click the Full View button at the bottom right of the Ultrabeat window to see the Sequencer/Matrix view.

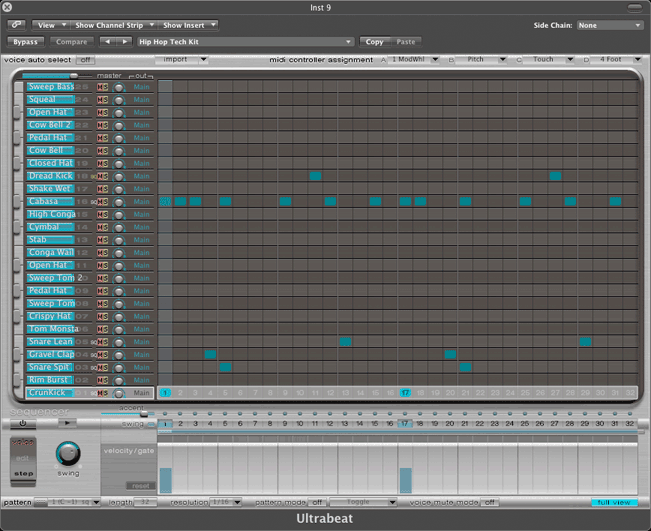
There is a small strip of 25 piano keys down the left side of the window. Each piano key is mapped to a particular sound. The sounds name is listed in blue. When you change presets the names and arrangement of keys change. Click a piano key to hear the sound assigned to that key.

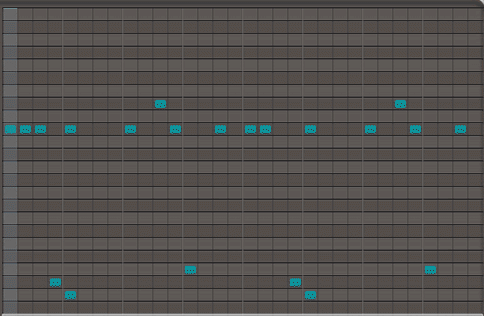
The rows correspond to the drum sounds. The columns correspond to the beat position. Drum sounds will play wherever there is a blue rectangle.
Turn the sequencer on. The Sequencer Power on button is towards the lower left corner of the window. It is highlighted in blue when on.
![]()
Press the play button.
![]()
Turn on the sequencer and play the pattern. While it is playing, randomly click in empty squares in the matrix. Anywhere you click will produce a new drum sound at that location.
Turn it off by clicking the green stop button.
![]()
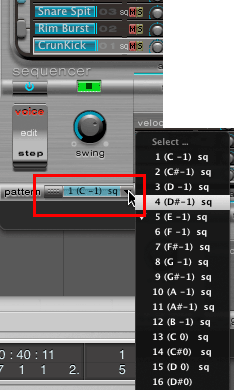
Click the pattern popup menu to change sequences.
Click the Full View button to return the the Sequencer-Matrix view.
First arrange the Ultrabeat window so that you can see track lane 8.
Click and drag this button to track lane 8.
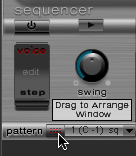
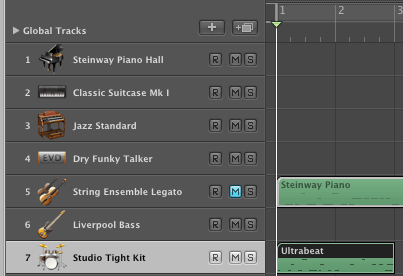
A green MIDI track should appear in track lane 8.
The track is two measures long as you can see by the measure grid lines.
Close the Ultrabeat window.
Hold the Option key down and click and hold in the track title, it should highlight in black, and drag to position 3 1 1 1.

Click the M button by the MIDI track to mute it.
![]()
Click the Logic play button to hear the Ultrabeat four measure pattern.
Tracks 7, 9, and 10 use Ultrabeat with different drum kits.
Turn the sequencer on.
![]()
Press the play button.
![]()
Turn the Sequencer off before trying the next track.
Click the Full View button at the bottom right of the Ultrabeat window to return to the Edit View.
You can edit every one of the 25 drum sounds in the Edit view.
We won't do this in lab, but the option is available in the presets menu.
Continue with Lab13-8AnalogLead.
Revised John Ellinger, January - September 2013