Download 19VTLab1.zip to the Desktop and unzip the file.
Open the 19VTLab1 folder and double click the 19VTLab1.logic project icon.
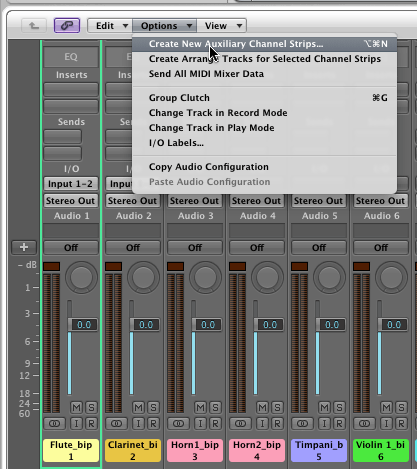
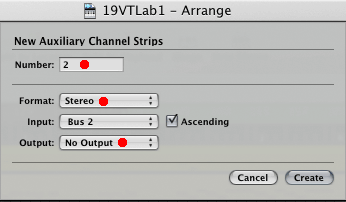
From the Options mini menu choose Create New Auxiliary Channel Strips.
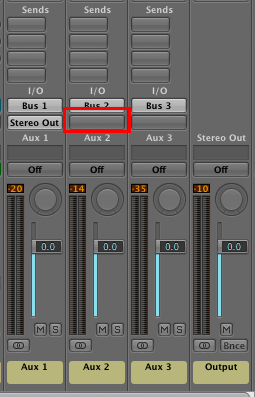
Make these settings:
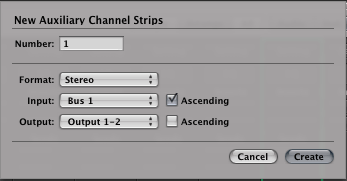
Select all instrument channel strips (1-21) by dragging across the name label.
![]()
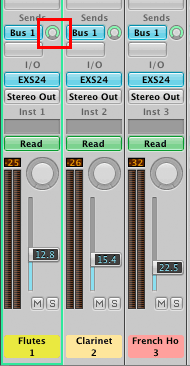
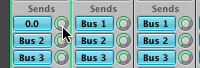
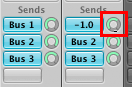
Enable a channel strip send on Bus 1.
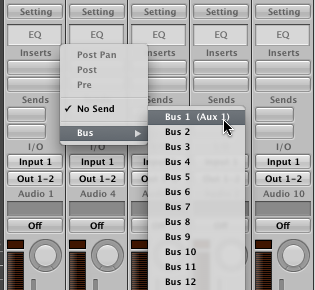
All Sends should now read Bus 1.

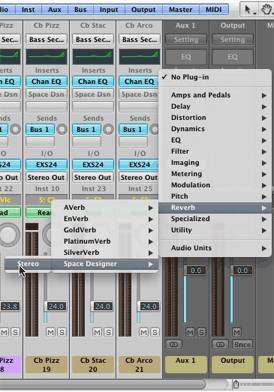
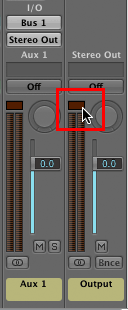
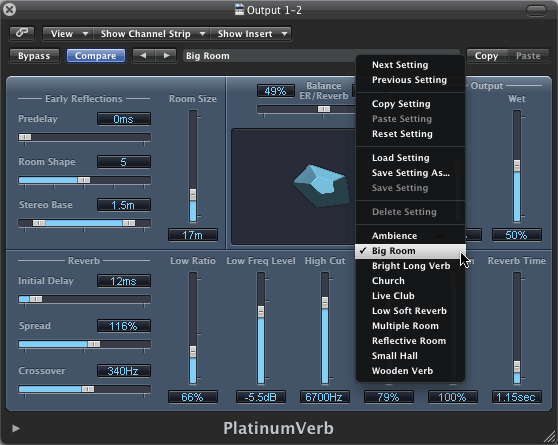
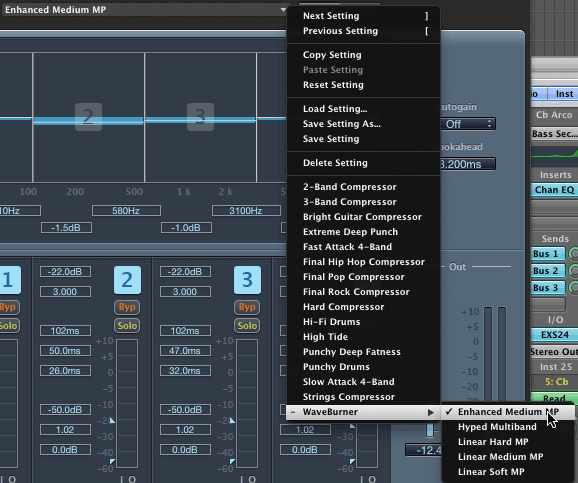
Click and hold the Insert button on the Aux 1 channel strip.
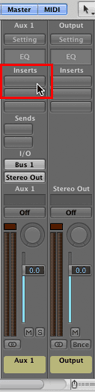
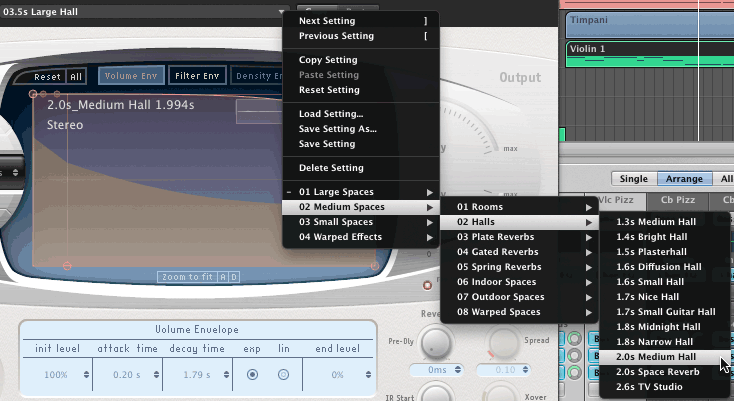
Select Reverb/Space Designer/Stereo.
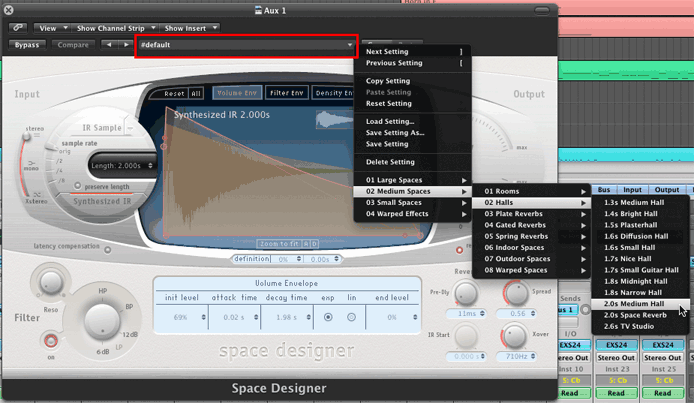
Select the 2.0s Medium Hall setting.
Loop over section E - where all instruments are playing
Click the Bypass button.
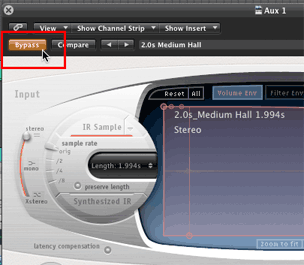
When Bypass is highlighted the effect is turned off. Right now there is no difference in sound whether the Reverb is on or off.
Turn Bypass off, make sure all 21 instrument channel strips are still selected, and the Loop is playing.
Click and hold the Send knob. Drag vertically to set the send level to maximum as shown by the light green arc surrounding the Send knob. Moving any one selected know will move all selected knobs. As you increase the send level, you should hear the Reverb kick in.
With the send level at maximum, toggle the Bypass button. You should hear a difference in volume. The sound is louder when the effect is bypassed.
Stop the sound by pressing the space bar.
Reset the Peak Level indicator on the Output channel.
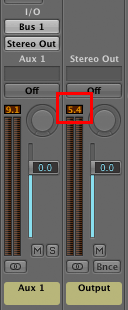
Turn Bypass On, press the space bar, and play through the loop. Press the space bar at the end of the loop.
My Peak indicator read -5.4 dB.
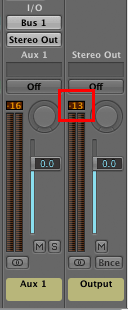
Turn Bypass off and play through the loop. Stop at the end.
My peak indicator read -13 dB, a 7.6 dB difference. Remember, a 6 dB difference is perceived as twice as loud or twice as soft.
Drag the Output Dry knob to -5.4 dB. This should make the effect volume closely match the bypass volume. Check it out.
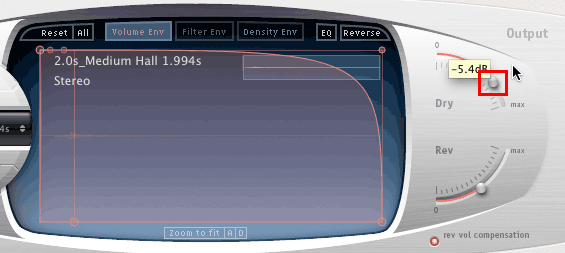
You can also change the amount of reverb by moving the Rev knob. Try it.
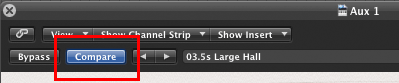
Choose the 04.5s Large Hall preset.
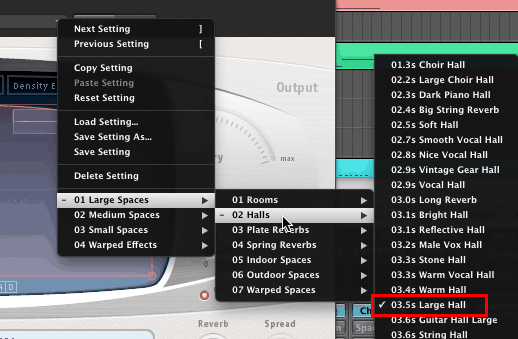
Toggle the Compare button to hear the difference between the two presets.
Generally speaking, more reverb places the instrument farther away from the listener.
You might try more reverb on instruments towards the back of the stage in the seating chart.
Here's a general idea of reverb amounts from least to most.
| Stage position |
Instruments |
Reverb amount |
|
| front | Violin 1, Cello | less | |
| middle front | Violin 2, Viola | more | |
| middle back | Flute, Clarinet, Horns | more | |
| back | Timpani, Bass | most |
Adjust the reverb send amount for each instrument.
The AuMatrix Reverb is much more CPU friendly than Space Designer.
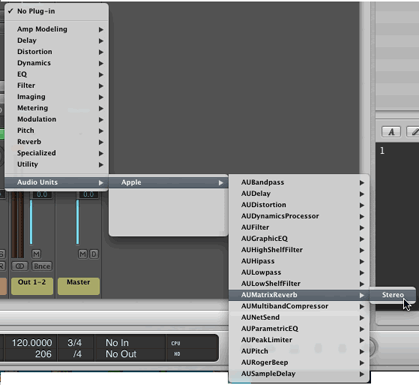
The AU Matrix Reverb plug-in has good presets; however, it has a very plain interface.
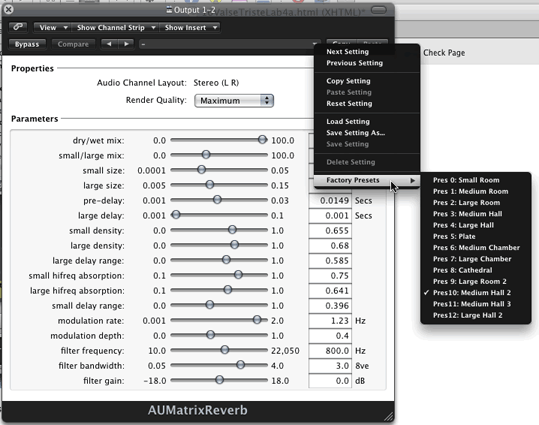
More CPU friendly than Space Designer.
Recording studios often send their tracks to mastering facilities. Mastering engineers have very specialized and expensive equipment that prepares the tracks for final output before released as CDs or DVDs. Mastering effects include compression, equalization, limiting, reverb and gain metering. Logic has a full suite of mastering plugins that work well for personal use but would probably not be used by a professional mastering facility.
We'll use these standard mastering plugins: Compressor, Equalizer, Reverb, Limiter, and Gain. There is debate over whether EQ or Compression should be first. Gain if used should be the last plug-in, otherwise the Limiter will be last.
Choose Create New Auxiliary Channel Strips from the Mixer Options menu.
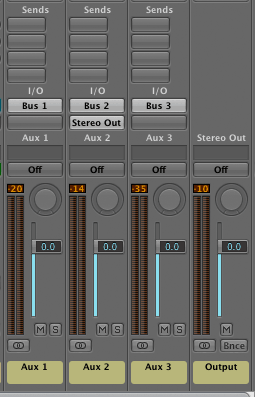
Make these settings:
Select all 21 instrument channel strips. Assign Send 1 to Bus 1, Send 2 to Bus 2, and Send 3 to Bus 3.
Duplicate the Bus 1 send levels in Bus 2.
| Stage position |
Instruments |
Reverb amount |
|
| front | Violin 1, Cello | less | |
| middle front | Violin 2, Viola | more | |
| middle back | Flute, Clarinet, Horns | more | |
| back | Timpani, Bass | most |
Hold down the Command key and drag the Space Designer effect to Aux 2.
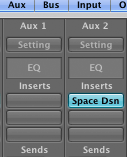
Set the Bus 1 send level to 0 dB.
Do the Same for Bus 3.
Zero dB here means input equals output.
Play and toggle the Space Designer Bypass button. Nothing happens because Aux 2 is not assigned to an Output.
Click and hold the Aux 2 Output button and assign Stereo Out. Set Bus 1 to No Output.
The Space Designer effect should work as before.
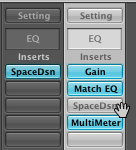
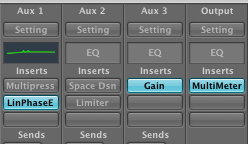
Assign these Insert effects to Aux 1 and Aux 3.
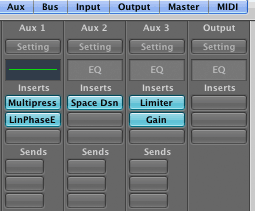
| Aux 1 | Menu |
| Multipressor | Dynamics/Multipressor/Stereo |
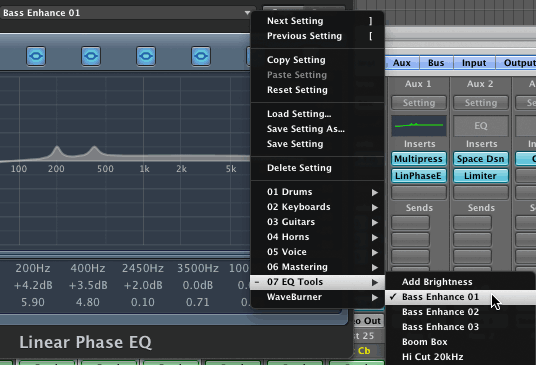
| Linear Phase EQ | EQ/Linear Phase EQ/Stereo |
| Aux 3 | Menu |
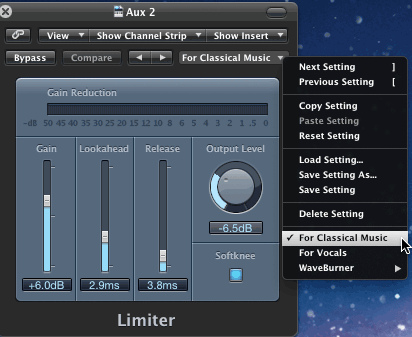
| Limiter | Dynamics/Limiter/Stereo |
| Gain | Utility/Gain/Stereo |
| Output | Menu |
| MultiMeter | Metering/MultiMeter/Stereo |
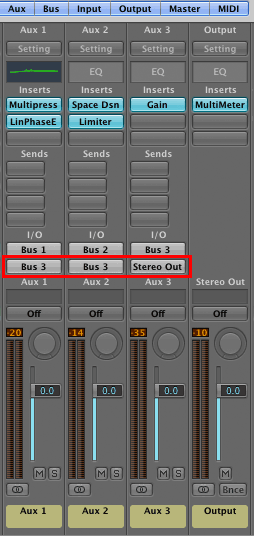

This plug-in is a tool for visualizing the frequency spectrum, volume and stereo width of your mix. It's a display only plug-in and does not affect the sound.
IMPORTANT: Just because this lab uses these plug-in effects does not mean you have to use them in your final project. Only use plug-ins that you think make your project sound better.
Option click a plug-in button to toggle between enabled and disabled.
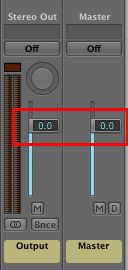
Keep the Output and Master channel strip faders at 0.0.
Disable all effects.
Set a loop from measure 134 to end.
Observe the Master Output peak indicator. If the peak indicator turns red it indicates clipping.
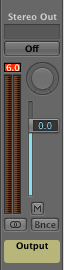
I will never ever let the peak indicator turn red on the Output channel.
I will never ever let the peak indicator turn red on the Output channel.
I will never ever let the peak indicator turn red on the Output channel.
I will never ever let the peak indicator turn red on the Output channel.
Enable the Gain button. Reduce the gain by -30.0 dB.
Hint: Hold the Shift key down when moving the fader to get precise values.
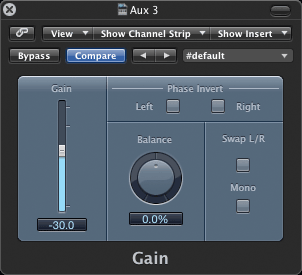
The Output no longer clips, but Aux 1 did.
Select all 21 instrument channel strips and turn the Bus 1 send knob to -1.0 dB.
Open the Channel EQ and MultiMeter plug-ins windows. Close the other other plug-ins windows.
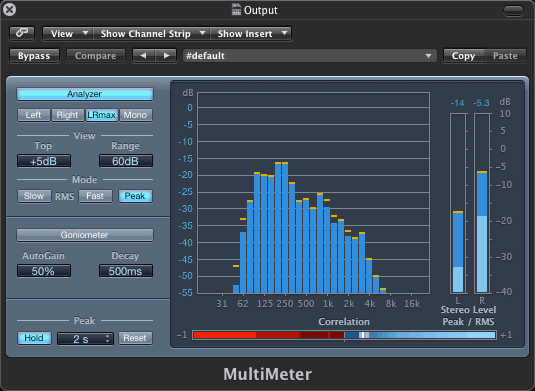
When Analyzer button is on you can see the frequency ranges in the sound and observe peak levels. In this example the Peak Hold button is on. The yellow bars hold for two seconds. The correlation bar shows the amount of stereo. You want it in the blue.
When the Goniometer button is on you can see the amount of stereo spread and whether it is balanced to much towards the right or too much towards the left.

Play VT at various points in the song and watch the Multimeter window.
Go back to the Analyzer view.
You may have noticed that the low frequencies are rather strong and boomy. You can see this by the relative height of the bars in the MultiMeter window representing frequencies in the 60-200 Hz range.
Using the Linear Phase EQ on Aux 1 reduce the frequencies in the 200 Hz band.
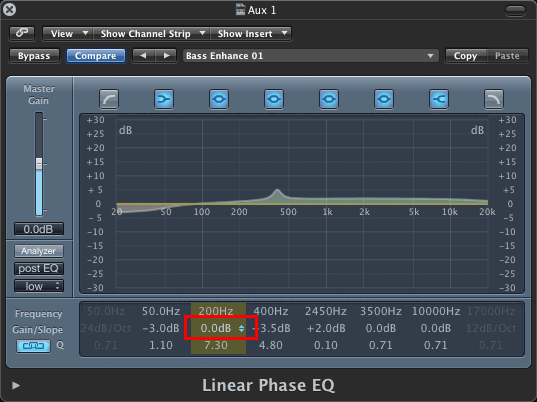
Can you hear a difference?
Can you see a difference in the Multimeter?
Enable the Multipressor
Disable EQ, Reverb, Limiter.
The multipressor is a four band Compressor. Compressors are used to raise low dynamics and lower high dynamics, in effect squeezing all dynamics into a smaller range.
Experiment with some of the presets.
Enable the Limiter.
Disable Compressor, EQ, Reverb, Gain.
Limiters are generally used to create a dB ceiling that cannot be exceeded. They are often used to ensure that the final output never goes above 0 dB.
Experiment with the Limiter presets and controls.
Enable all plugins.
Experiment with disabling different combinations of effects.
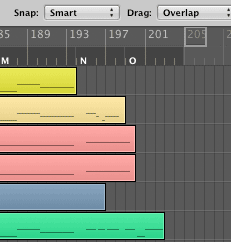
Set the End Marker to 208, past the last MIDI event. This will allow time for reverb tails to die away.

The end marker is displayed as a box in the measure strip.
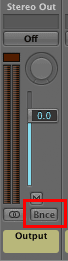
Based on the above experiments, choose your favorite Mix. When you are satisfied with the playback, make sure no tracks are soloed or muted and click the Bnce button.
Play through the Mix and make sure the Output channel strip does not see red.
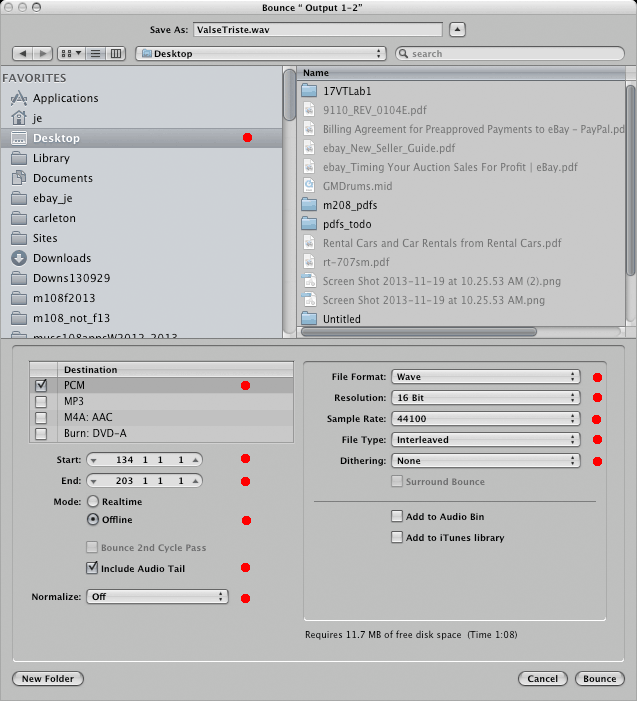
When the Bounce dialog appears, make these settings. Name the bounce ValseTristeStereoMix. Save to the Desktop.
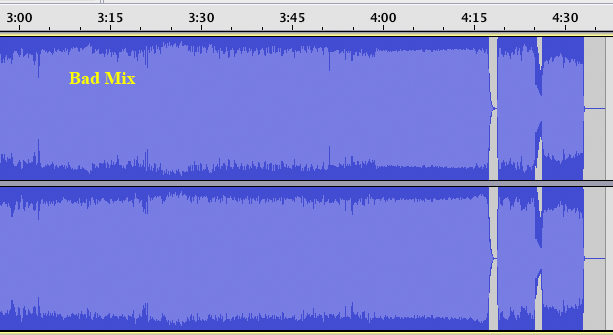
A good mix will have a wide range of dynamics (amplitudes).

A bad mix will not. Bad mixes have flat tops that indicate clipping. Bad mixes result from excessive gain and aggressive compression and limiting.
DO NOT TURN IN A BAD MIX.
Open the wave file in Audacity and play it.