Continue to use the LogicLab16_1 project from Lab 1.
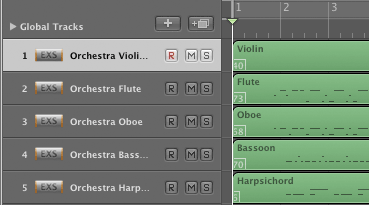
The Arrange Panel shows both the track name of the instrument saved in the SMF (gray on green) and the instrument automatically selected by Logic when the track was imported (white on gray). The small white rectangle in the lower left corner of the MIDI track shows the GM Patch number that was found in the SMF.
The track list shows that all five instruments are using the EXS24 sampler for output. OK, but what instruments did Logic choose from the EXS24 sample libraries?
Select the Violin track. Click and hold the Orchestra Violin Section 1 button in the Inspector panel.
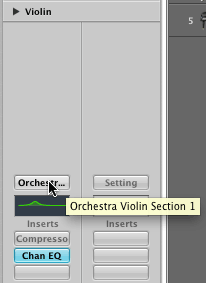
The pathname to the actual instrument chosen will be preceded by a dash. In this case the sound comes from " GarageBand".
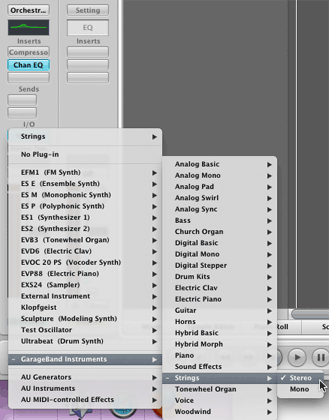
The GarageBand samples may be better than those in AuLab you've used before, but Logic has even better choices. These sample libraries can be used in Logic. The list is arranged from good to best.
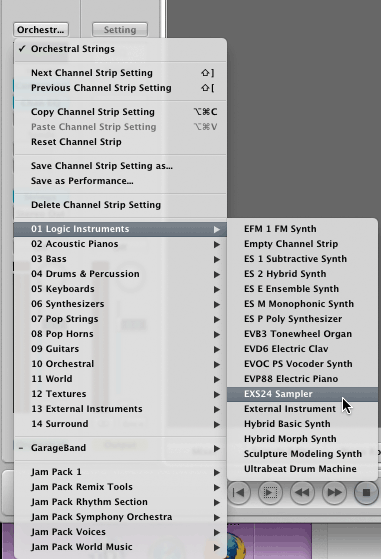
First change to the EXS24 Sampler. Click and hold the Orchestra... button.
Select the EXS24 Sampler.
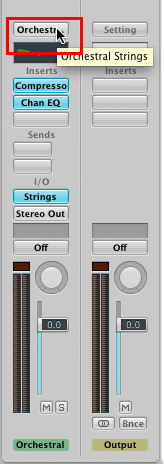
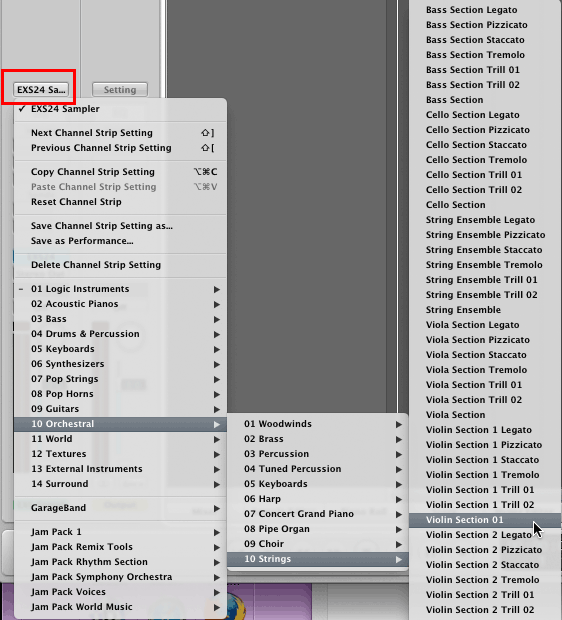
Click and hold the EXS24 Sa... button and choose Violin Section 01.
Here's another way to change samples.
Select the Flute Track.
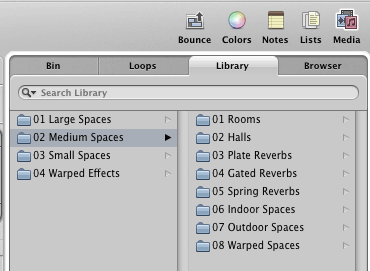
Click the Media Tool to display the Media panel. Then click the Library tab and set the scroll bar fully to the left.
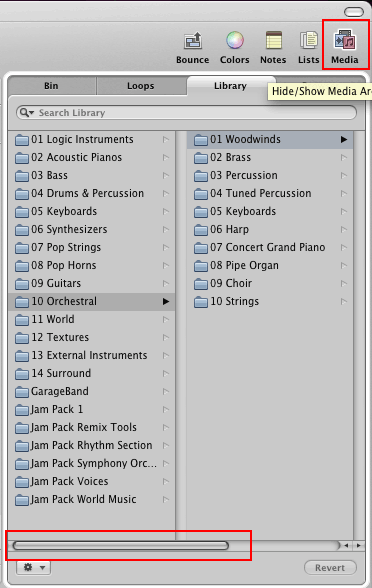
Change the Flute to "10 Orchestral/01 Woodwinds/Flute." Click Flute to set.
Change the Oboe. Select the Oboe track. This time type Oboe in the search bar of the Media panel and type return. All the Oboes available in Logic are displayed. Click "Oboe." If you want to audition the different oboes, solo the oboe track and click the various oboes listed in the Media panel.
Change the Bassoon, and Harpsichord in the same way.
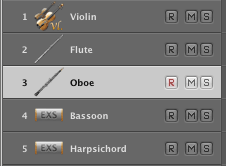
The track list now shows these instrument icons.
Stop after a few measures.
This is equivalent to the MIDI controller message 7 for Volume and message 10 for Pan.
This time open it from the Window menu in Logic. Shortcut: The shortcut is Apple-2.
Shortcut: This is really handy, remember it.
You can set the volume level and pan for each instrument in the Mixer while the song plays. These are the settings I used.
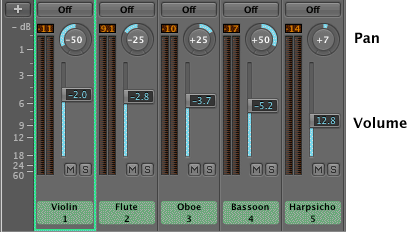
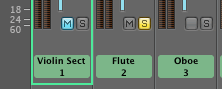
As you're balancing and panning the tracks, you can use the M and S buttons to solo or mute and individual track or combinations of tracks.
Every track uses the Space Designer reverb effect, but each track uses it's own reverb setting within Space Designer. Normally you want a group of instruments to play in the same reverb space. You have four reverb options in Logic. You'll need to determine by listening (through headphones) which one is best for your project.
Case 1 - accept the Logic settings as is.
Case 2 - accept the Logic settings but add a master Reverb effect on the Output channel in the Mixer that will affect all instruments equally.
Case 3 - remove the reverbs (click-hold the effect button and choose "No Plug-in") or disable the reverbs (Option-click the effect button) on each instrument and add a master Reverb effect on Output channel in the Mixer that will affect all instruments equally.
Case 4 - remove or disable the reverbs on each instrument and insert a Send on the first track. This will create a new channel strip called Aux 1.
Play and listen.
Add a Space Designer plug-in to the Output Channel Strip.

Choose a reverb effect from the Space Designer menu.
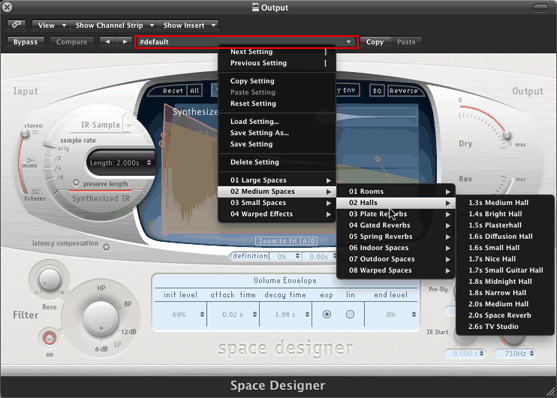
Close the Space Designer window.
Play and Listen
Disable the reverb effects on each instrument by Option-clicking the effect button. Play and Listen.
You can use the Media Library to audition Space Designer effects. Click once on the Space Dsn button in the output channel strip on the mixer. You should see the Space Designer presets in the Media Panel. Try some.
Disable Space Dsn from the output channel strip.
Solo the Violin Track. Loop the violin track from measures 4.5 to 10.5.
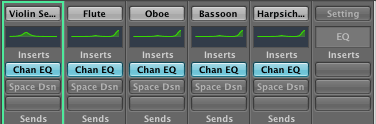
Double click the Chan EQ button on the Violin channel strip in the Mixer to display the Channel EQ plug-in interface.
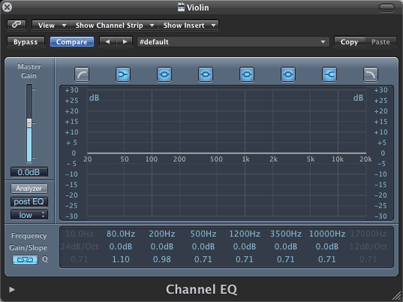
The Media Library panel should now be showing presets available for the Chan EQ.
Select "07 EQ Tools". Then click any of the presets. Watch the plug-in interface change and listen to the results.
Remove the Space Designer effect from the Output channel strip.
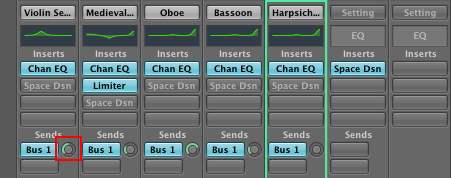
The reverb effect has been removed or disabled from each track. Click and hold the Send button on the Violin Track. Chose Bus 1 in the menu that appears. This will create a new channel strip called Aux 1.
Add a Space Designer effect to the Aux 1 channel strip. Choose a new reverb effect in the Space Designer menu.
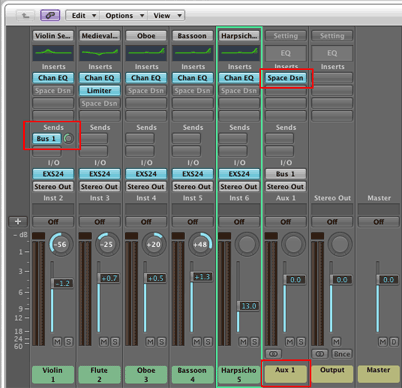
Click the send button on all other tracks and send to Bus 1. Then use the small send knob to the right of the Bus 1 button to control the amount of signal that gets sent to the reverb. Play and listen.
Save this project with a new name, LogicLab16_2.logic.
We'll use this project again in Lab 3.
Close the current project but don't quit from Logic.
Continue with 16LogicLab3
Revised John Ellinger, January - September 2013