
This lab will look at EQ effects.
Download StarsStripes.wav.zip.
Copy it to your Desktop.
Double click to create the StarsStrips.wav file on your Desktop.
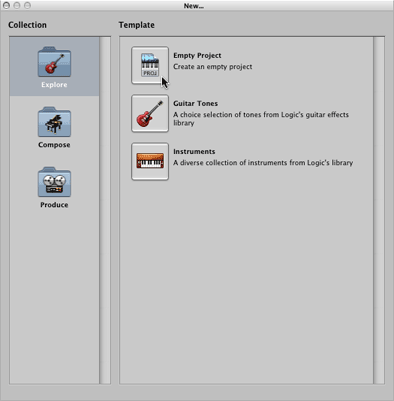
Choose New from the File menu.
Click Empty Project
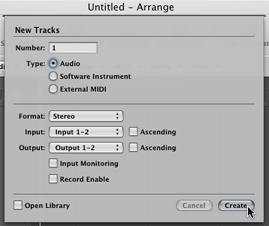
Create 1 new Stereo Audio track.
Open the Media Bin.
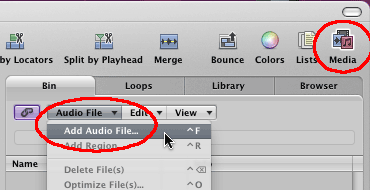
Use the Audio File mini menu and select Add Audio File.
In the Open File dialog, navigate to the Destkop and choose StarsStripes.wav.

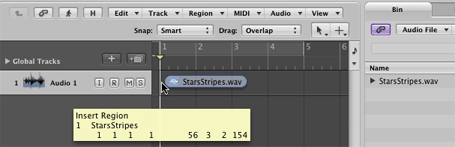
Drag copy the StarsStripes.wav to the Arrange window.
Close the Media bin.
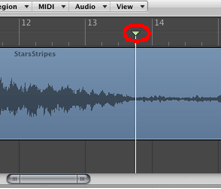
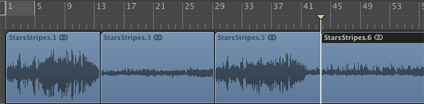
These controls manipulate scrolling and zooming of the wave file. Experiment.
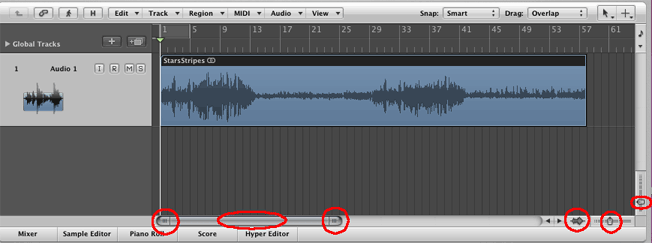
You can see four distinct sections of the audio wave.

We want to segment the waveform and try different EQs on each segment.
Choose New from the Track mini menu.
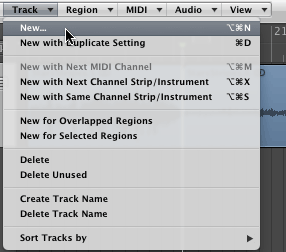
Add 3 audio tracks.
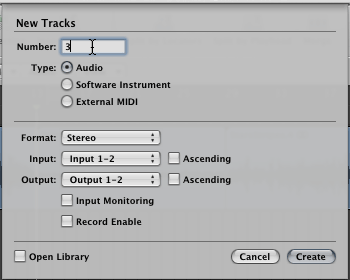
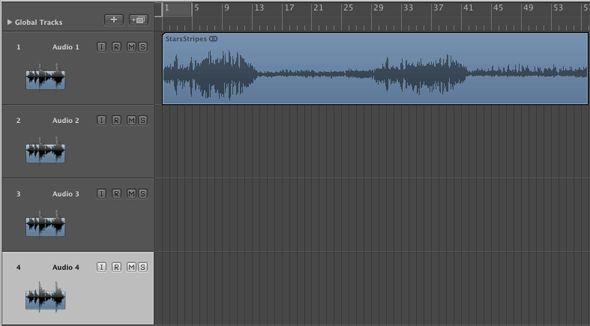
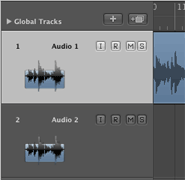
You should see four audio tracks.
Position the Playhead around 13-4 in the Measures-Beats toolbar.
Make sure Audio 1 is selected (light gray).
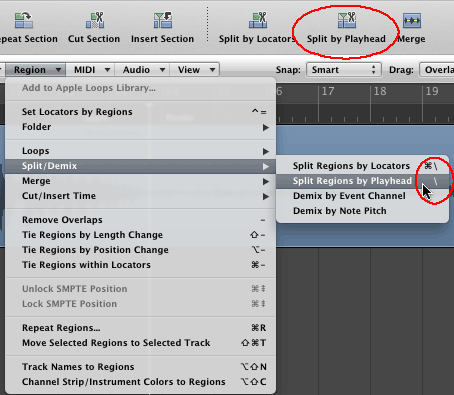
You split the track using any of these three methods.
Hint: Typing \ is the quickest.
Zoom the track horizontally so you can see the ticks between 29 and 29.3
Position the Playhead at the 29-2 point.
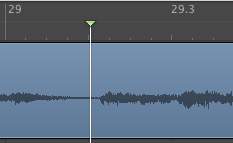
You can see the playhead position in the controls at the bottom of the window.

Type \ to split.
Double click the Playhead position and enter the following numbers.

Press return and the playhead moves to that position.
Type \ to split.
Scroll horizontally until you can see all four segments.
Click and hold the header of segment 2. You'll see a yellow popup menu showing the start and end points of the segment.
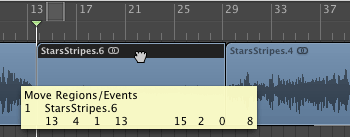
Drag down into track 2. Make sure the start point does not change.
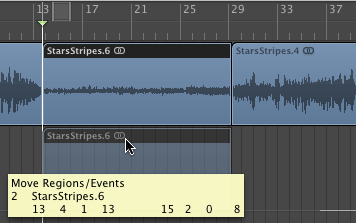
Do the same for segments 3 and 4. After you're done you should see this.
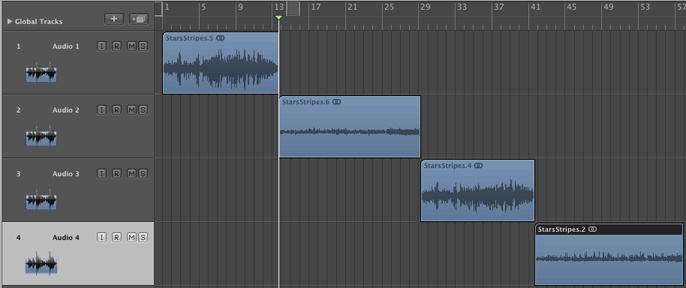
Click the header for segment 1 and then click the Set Locators button.
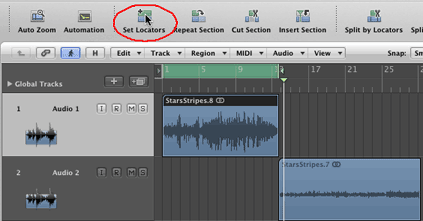
Turn on the Loop button.
![]()
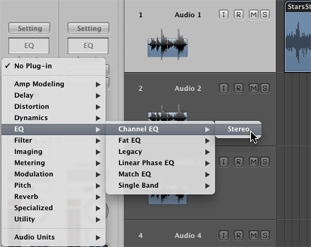
Make sure Audio 1 is selected (light gray). Insert Channel EQ on the Audio 1 track.
 |
 |
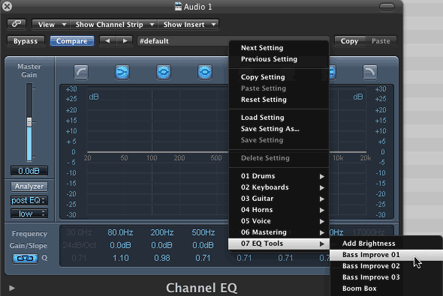
Choose the Bass Improve 01 preset.
Click the Effect Bypass button to do an A/B comparison.
Close the Channel EQ window for Audio 1.
Audio 2 features the piccolo. The piccolo plays high freqencies. We want to make the other parts stand out a little more.
Make sure Audio 2 is selected (light gray). Insert another Channel EQ on the Audio 2 track.
Click the header for segment 2 and then click the Set Locators button.
Turn on the Loop button.
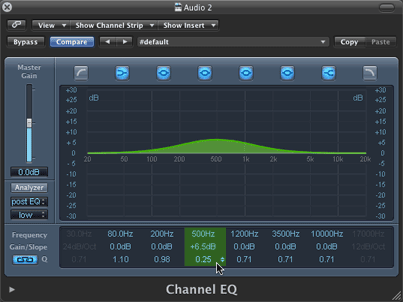
Click the 500 Hz segment.
Click and drag the dB text. The vertical height of the green plot indicates an increase or decrease in dB.
Click and drag the bottom text. This affects the "Q" of the equalizer. Q refers to the bandwith of the EQ band. High Q is narrow bandwidth, low Q is high bandwidth.
Grab the green circle at the center of the band. Drag it right or left and listen to the frequencies change.
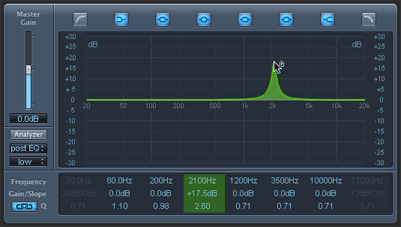
Double click on each of the numbers and reset to.
| 500 Hz |
| +6.5 dB |
| 0.25 |
Close the Channel EQ window for Audio 2.
In Audio 3 we'll use EQ to emphasize the high frequencies of the cymbals.
Make sure Audio 3 is selected (light gray). Insert another Channel EQ on the Audio 3 track.
Click the header for segment 3 and then click the Set Locators button.
Turn on the Loop button.
Turn off all Filter types in the row above the plot except for the second to last.
Turn on the Analyzer.
When the Cymbals play you'll see activity in the 4000 = 10000 Hz range. We want to emphasize that.
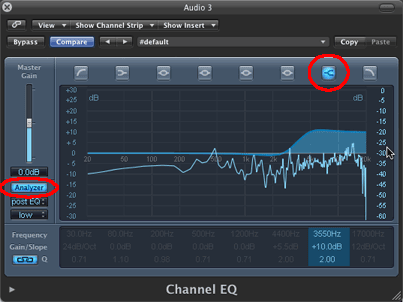
Click the 10000 Hz settings and change them to those shown.
| 3500 Hz |
| +10 dB |
| 2.00 |
Experiment.
Close the Channel EQ window for Audio 3 when finished.
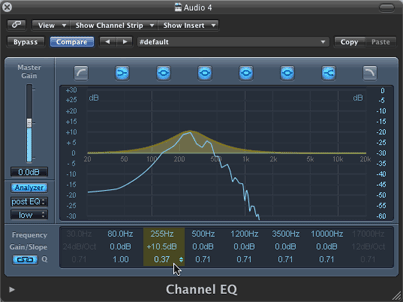
In Audio 4 we'll use EQ to emphasize the make the tuba part stand out.
Make sure Audio 4 is selected (light gray). Insert another Channel EQ on the Audio 4 track.
Click the header for segment 4 and then click the Set Locators button.
Turn on the Loop button.
Make these settings.
Experiment.
Close the Channel EQ window for Audio 4 when finished.
Turn off the loop.
Double click the Stop button to return the playhead to the beginning of the song.
Click play.
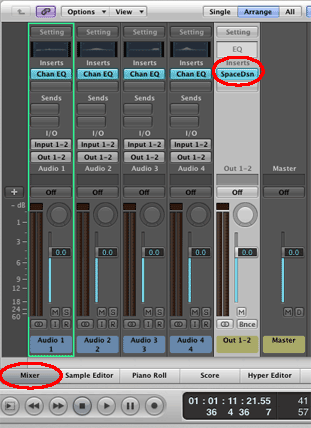
Click the Mixer tab and insert the Space Designer Reverb plugin on the Out 1-2 channel strip.
Choose the "01 Large Spaces - 06 Outdoor Spaces - 02.9s On The Open Field" preset.
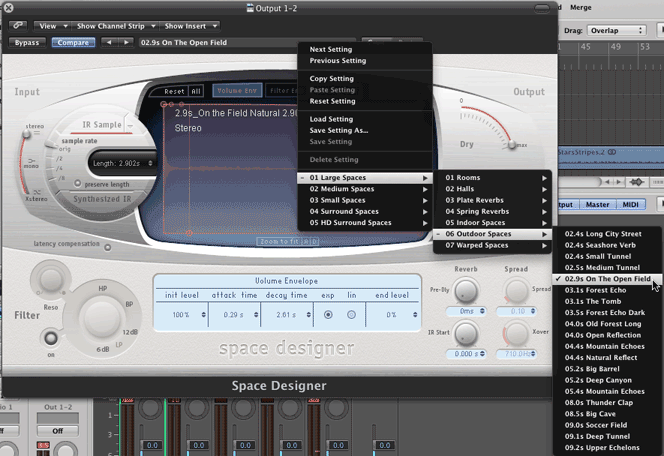
Press the Bypass button to do an A/B comparison.
Try other presets.
Revised John Ellinger, January - September 2013