Download this file lab13sounds.zip. Double click the downloaded lab13sounds.zip icon.
A lab13sounds folder will appear.
Open the folder to display three wav files.
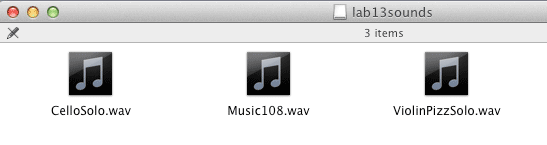
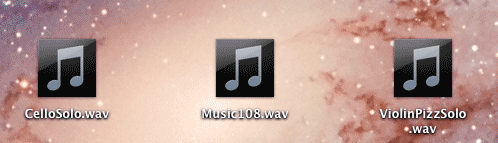
Copy these three wav files to the Desktop.
These three sound files will be used throughout this lab to illustrate several different effects available in Audacity.
| Wave File | Play | Comments |
| Music108.wav | JE talking | |
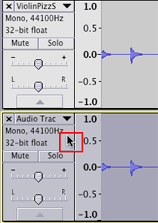
| ViolinPizzicatoSolo.wav | A short melody I wrote for this lab played pizzicato on the violin. Sharp attack and very little sustain. |
|
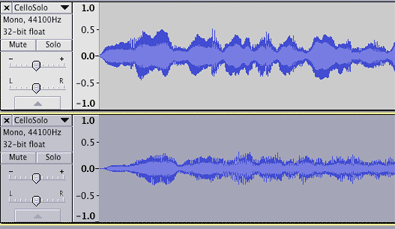
| CelloSolo.wav | The same melody played legato on the cello. Smooth attack and long sustain. |

Audio effects fall into two main categories: time domain effects and frequency domain effects. Time domain effects operate on the individual samples of the waveform (44100 samples per second). Time domain samples can be converted into the frequency domain using the Fast Fourier Transform (FFT). Frequency domain effects manipulate individual frequencies of the FFT spectrum (0- 22,050 Hz) of the waveform. The modified spectrum can be converted back into time domain samples using the inverse FFT.
We'll look at time domain effects first.
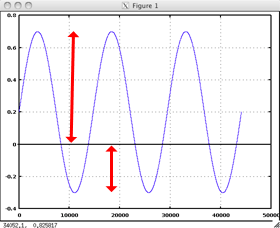
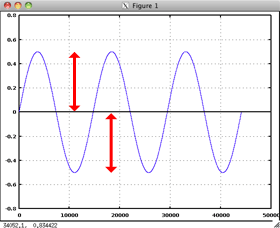
The Remove DC Offset effect should be the first effect used on an audio file. Effects work optimally when the mean (average) of all sample amplitudes is zero. Remove DC offset sums the amplitudes of all samples and divides by the total number of samples. If the number is not zero, Remove DC uses the average value to increase or decrease the amplitude of each sample. If the average value is negative, that value is added to every sample. If the average value is positive, that value is subtracted from every sample. The average value of all samples in the resulting waveform is zero.
DC = .2 (bad) |
DC = 0 (good) |
 |
 |
The Normalize effect raises the volume of a sound to its maximum level without clipping. Amplitude values of the waveform are real numbers within the range of ±1.0. The positve and negative valued samples are treated independently. If the the largest positive sample value in a wav file is 0.890000, then 0.11 would be added to every positive sample. If the largest negative value is -.7812345, then -0.2187655 would be added to every negative sample. The samples of the resulting waveform now cover the full range between ±1.0.
Open the Audacity sound editor application.
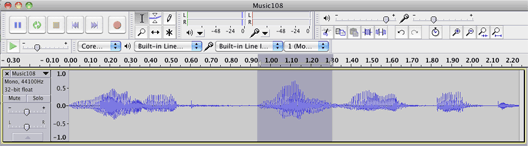
Open the file Music108.wav.
Add 4 more tracks and copy Music108.wav into each track. When you're finished the Audacity window should look like this.
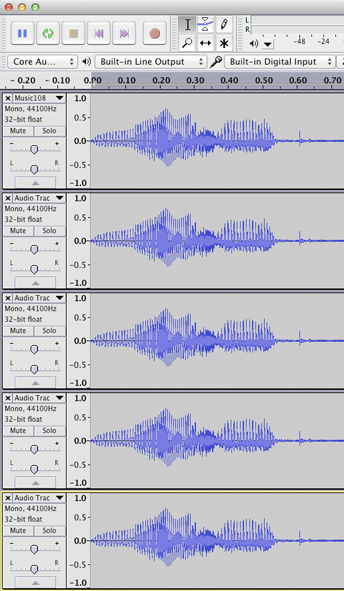
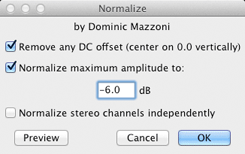
Choose Normalize from the Effects menu. Notice that Remove any DC offset is checked.
Zero decibels (dB) is by definition equal to an amplitude of 1.0 and is at maximum volume. Any dB value greater than zero causes clipping and should be avoided.
Normalize to maximum amplitude of -6 dB. The -6dB change is reduces the amplitude in half. A ±6 dB change is perceived as twice as loud or twice as soft.
.
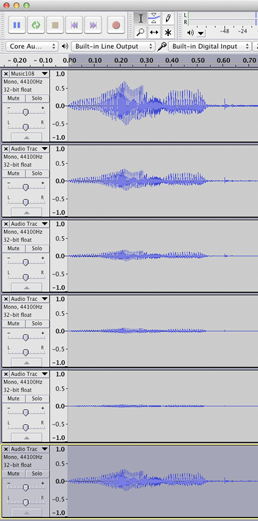
Repeat for the remaining tracks according to this table.
Track 1 is already at 0 dB. Each track is -6 dB lower, or half the amplitude of the previous track.
| Track Number | Amplitude | dB |
| 1 | 1.0 | 0 |
| 2 | .5 | -6 |
| 3 | .25 | -12 |
| 4 | .125 |
-18 |
| 5 | .0625 | -24 |
When you're finished Audacity should look like this.

Using the Solo button, play each track. As you play the tracks from top to bottom, does the amplitude seem half as loud as the previous one?
The Amplify effect converts the volume of a sound to a specific decibel level. Amplify is similar to Normalize without the Remove DC Offset function.
Add a new audio track, track 6. Copy the waveform of track 5, the softest track, into track 6.
Select track 6.
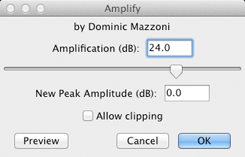
Choose Amplify from the Effects menu. When the Amplify dialog appears, Audacity has calculated the amount of amplification needed to bring the file up to 0 dB, maximum volume without clipping.
Adjust the slider to set the New Peak Amplitude amount to any desired level.
Let's make track 5 the same dB level as track 2 (-6 dB). Set the New Peak Amplitude to -6.0 and click OK.
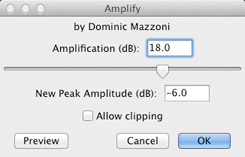
The results should. look like this.
Do an A/B listening comparison between track 2 and track 6. They should sound the same.
Close this window.
Amplitude can be converted to decibels using this formula.
![]()
Doubling the amplitude increases the volume by 6 dB.
![]()
Halving the amplitude attenuates the volume by 6 dB.
![]()
An amplitude 10 times larger or smaller is 20 dB change. An amplitude 100 times larger or smaller is a 40 dB change. An amplitude 1000 times larger or smaller is a 60 dB change. A 1 dB change is is barely noticeable.
Use this formula to convert from decibels to amplitude.
![]()
0 dB = 1. 0, maximum amplitude
-6 dB = .50119, half maximum amplitude
A unipolar function is a function whose values are always postiive (or zero) or always negative (or zero).
Audio envelopes are unipolar functions with values between zero and one. You worked with envelopes in 12Lab3 and in 09Lab5 - Frere Jacques.
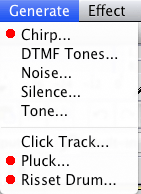
Open a new Audacity window and Generate a Sine tone for 2 seconds.
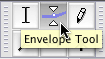
Select the Envelope tool to create an envelope over the waveform.
Each time you click the thick blue envelope line, a small white rectangle (handle) appears. You can drag the small white handles up down and right left. You can create as many handles as you need. You can remove handles by dragging to the left. Here's a close up of a handle ready to be dragged.

Create an envelope similar to this. I used the Fade In and Fade Out commands from the Effect menu to create the fades. Select an appropriate amount of the waveform before applying the fade.
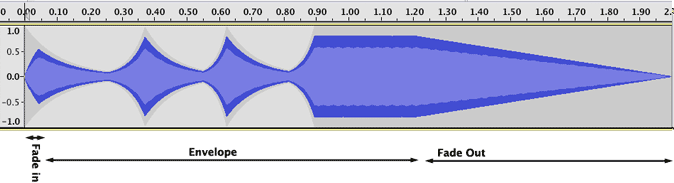
Play it.
In 12Lab2 you reversed a portion of the Ziwzih Ziwzih OO-OO-OO-OO song.
Let's see what the enveloped sine wave sounds like in reverse.
Select track 1 and choose Duplicate from the Edit menu. Alternatively, create a new audio track and paste track 1 into track 2.
Select track 2 and choose Reverse from the Effects menu.
Solo track 2 and play.

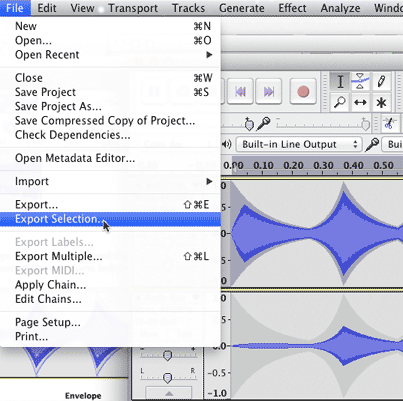
That's not what was expected. Let's try a different approach. Select track 1 and choose Export Selection from the file menu. Save it to the Desktop as a file called sinEnv.wav.
Choose Import from the File menu and import the audio file sinEnv.wav. It should appear in track 3. You can see that it's the reverse image of track 1. Play it.
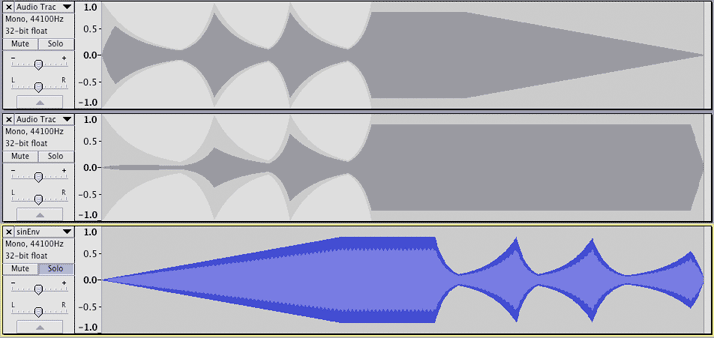
Close this window.
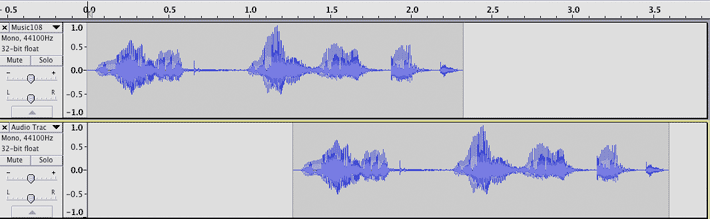
Cross fades are used when you want the end of one track to fade out while the beginning of another track is fading in.
Open Music108.wav in a new window.
Add a second track and copy paste the Music108 sound into track 2.
Slide track 2 to the right.
Select the second half of track one.
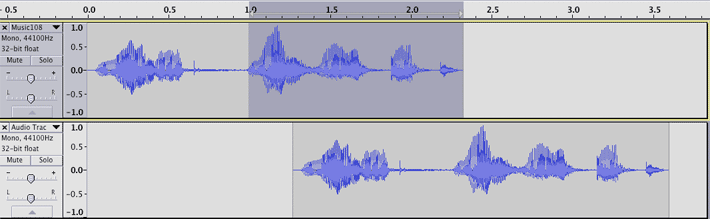
Choose Fade out from the Effects menu.
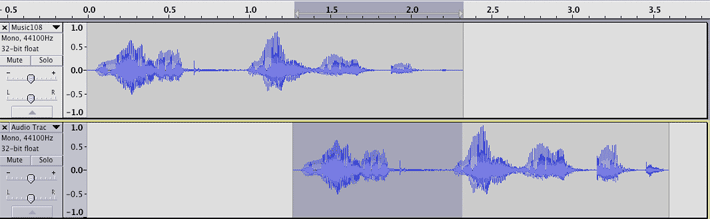
Select the beginning of track two.
Choose Fade in from the Effects menu.
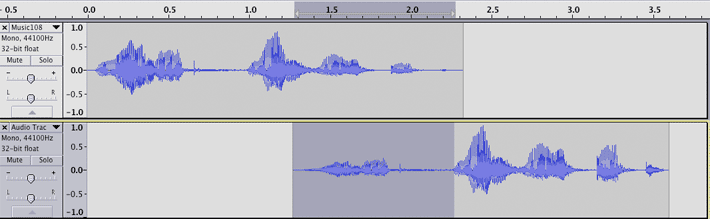
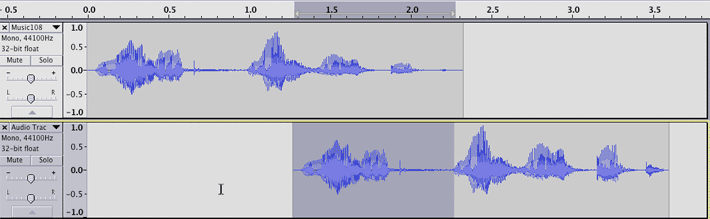
Play it.
Close the Window.
The most common method of changing the speed of a sound is to skip samples or play a sample more than once. This type of speed change affects the pitch as well as the length of the file.
Open the Music108.wav file.
Select the entire track and choose Change Speed from the Effects menu.
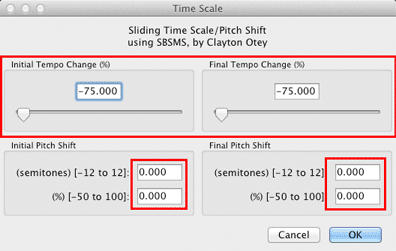
Audacity interprets 0.00 percent change as the speed the file was recorded at. To play the file at two thirds the original speed, enter -33.333 in the Percent Change edit box.
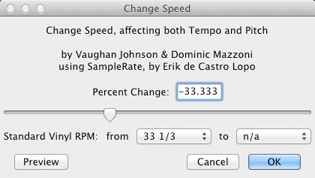
The waveform is now 50% longer. Here's how it could be done.
| Method | Original Samples | 33.33% slower |
| Repeat samples | 1 2 3 4 5 6 7 8 | 1 1 2 3 3 4 5 5 6 7 7 8 |
| Repeat samples | 1 2 3 4 5 6 7 8 | 1 2 2 3 4 4 5 6 6 7 8 8 |
| Interpolation | 1 2 3 4 5 6 7 8 | 1 1.5 2 2.5 3 3.5 4 4.5 6 6.5 7 7.5 8 |
Click Preview to listen.
Then click OK to apply the effect.
Play it.
Undo the previous slowdown.
To double the speed enter 100 in the Percent Change Edit box.
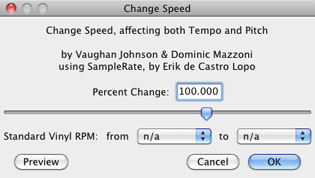
The waveform is now 50% shorter. Here's how it could be done.
| Method | Original Samples | 50% faster |
| Repeat samples | 1 2 3 4 5 6 7 8 | 1 3 5 5 7 |
Click Preview to listen.
Then click OK to apply the effect.
Play it.
Undo the previous slowdown.
Select the word "one" in the waveform.
Whenever you join two segments of a sound wave you want to make sure that the are joined at zero crossings to avoid clicks. Audacity has a command for this. You'll use it a lot. The shortcut is to type z. One letter, z.
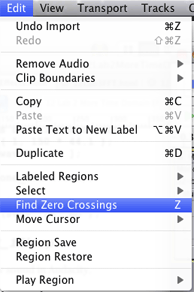
Type z.
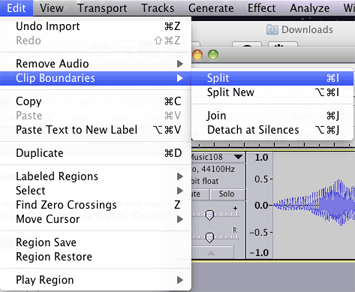
Use the Audacity Split command to create a separate sound clip of the word one.
Shortcut: Apple-I.
Using the Time Shift Tool, slide the selection to the right of the word one farther to the right.

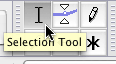
Using the Selection Tool, click in empty space right after the word one.

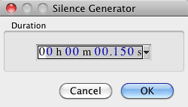
Choose Silence from the Generate menu. In the Silence Generator dialog choose the millisecond display format and set the silence to a length of 150 ms.
Use the Time Shift Tool to slide the left edge of the silence to the right edge of the word one.

Use the Selection tool to select the word one and the 150 ms silence.
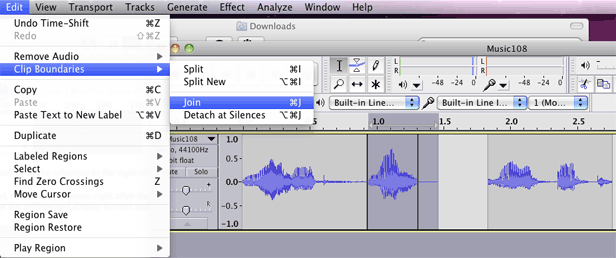
Then choose the Join command.
Shortcut: Apple-J.
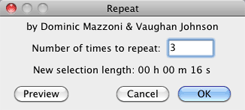
Choose the Repeat effect from the Effects menu and repeat the word one 3 times. You may have to slide the right most clip to the right to make room for the repeat.

Select the entire waveform and type Apple-J to Join.
Play it.
Select the "M" sound from "Music". Snap to zero crossings (type Z). Split, slide, repeat 5x.
Select the "K" sound from "Music" . Snap to zero crossings (type Z). Split, slide, repeat 5x.
Select the "T" sound from "Eight". Snap to zero crossings (type Z). Split, slide, repeat 8x and Fade out.

Play it.
Close the window.
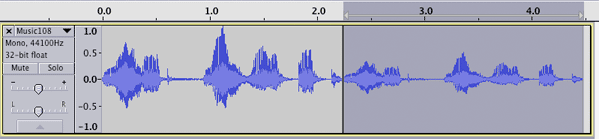
Delay effects are produced when two or more copies of a single sound file are played together and the copies start at different times from the original. The time that the copies start is known as a Tap. When one delayed copy is used it's called a Single Tap Delay. When multiple delayed copies are used it's called a Multi Tap Delay.
Digital audio files may contain millions of samples. Delay times can be measured in samples, but are usually measured in milliseconds or seconds. When the tempo of the audio file is known, the delay time can be calculated as a fraction of a beat. This type of delay effect is called Tempo Sync Delay.
Delay times can be categorized as:
Short delays range from a few samples to a few milliseconds, generally less than 10 ms and are sometimes used to compensate for phase issues in stereo recordings. If two microphones are more than a few inches apart, sounds reach the left and right microphones at different times and can cause phase cancellation. By calculating the distance between the microphones and knowing the speed of sound, you can calculate the number of samples needed to delay one of the signals in order to reduce the phase cancellation problems.
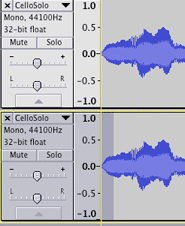
Open CelloSolo.wav in a new Audacity window.
Choose Duplicate from the Edit menu.
Shortcut: Apple-D
Track 2 will be an exact copy of track 1.
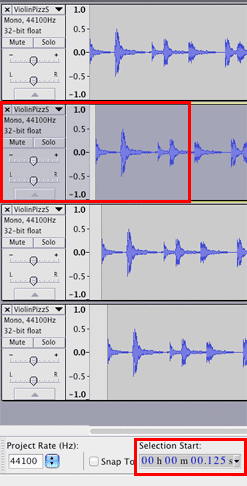
Click and hold the Selection Start popup menu

and choose hours:minutes:seconds+milliseconds.

Click once in the information area for Track 2 to select the entire track 2 waveform.
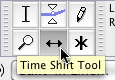
Select the Time Shift Tool
Click and hold in the waveform of track 2 and drag to the right. Try to align on 5 milliseconds. Good luck. You won't be able to.
You need to zoom in on the waveform. You can do this two ways.
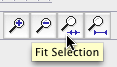
1. Use the Selection tool and select a small slice at the beginning
Click the Fit To Selection Tool.
 |
 |
OR
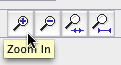
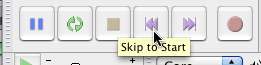
2. Click the Zoom In Tool several ( maybe 5 ) times. Then click the Skip To Start tool to go back to the beginning of the waveform.
 |
 |
When either of these steps have been done click once in the information area for Track 2 to select the entire track 2 waveform.
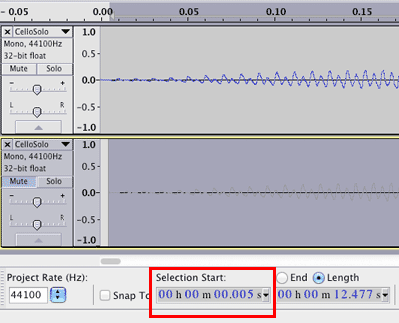
Using the time shift tool you should be able to align it to 5 milliseconds.
Play both tracks together. While listening, mute and un-mute track 2. Can you hear any difference?
Listen again with a 10 ms delay.
You should hear a very slight thickening of the sound.
Medium delays in the rage of 10-50 milliseconds have the effect of "fattening" a signal.
Set the delay to 40 ms.
This type of effect is sometimes called "Chorusing".
Play both tracks together. While listening, mute and un-mute track 2.
"Slapback echo uses a longer delay time (75 to 250 milliseconds), with little or no feedback. The effect is characteristic of vocals on 1950s rock-n-roll records, particularly those issued by Sun. Irish guitarist The Edge was also well known for popularizing the use of slapback delay as a melodic device in the 1980s. It is also sometimes used on instruments, particularly drums and percussion. Slapback was often produced by refeeding the output signal from the playback head of a tape recorder to its record head, the physical space between heads, the speed of the tape, and the chosen volume being the main controlling factors. Analog and later digital delay machines also easily produced the effect." http://en.wikipedia.org/wiki/Delay_(audio_effect)
Set the delay time to 100 ms.
Play both tracks together. While listening, mute and un-mute track 2.
It's hard to hear the double attack on the cello.
Open the ViolinPizzSolo.wav file in a new Audacity window. Duplicate the track. Set the track2 delay to 100 ms and listen.
You should be able to easily hear the double attack (slapback)
Delays longer than 100 milliseconds are heard as distinct echoes.
Change the delay time to 300.
Listen to both ViolinPizzSolo and CelloSolo.
Play both tracks together. While listening, mute and un-mute track 2.
This melody was designed as a canon or round. If you set the delay time to 3000 ms you'll hear the canon.
Listen to both ViolinPizzSolo and CelloSolo.
Multiple delays from a single sound source. Each delay can have different delay times and amplitudes.
Open Music108.wav.
Create a total of four copies in four tracks.
Use the Amplify effect and reduce the amplitude by -6 dB in successive tracks.
Track |
Amplify dB |
Approximate delay time |
1 |
0 dB |
0 seconds |
2 |
-6 dB |
.5 seconds |
3 |
-12 dB |
1.0 seconds |
4 |
-18 dB |
1.5 seconds |
Use the time shift tool to slide each track to its approximate delay time. You can see the time in seconds in the time ruler.
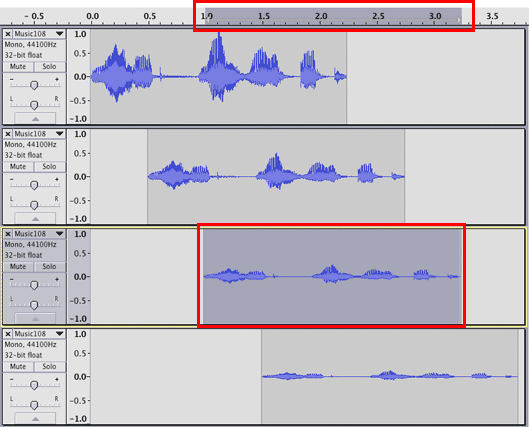
Play.
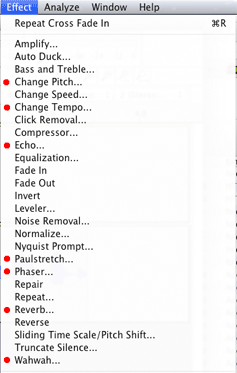
Audacity has two Delay effects: Delay and AUDelay. Both are found below the divider in the Effects menu.
Music108.wav should still be open.
Delete tracks 2, 3, and 4.
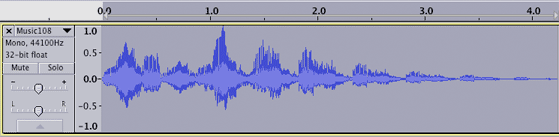
Choose Delay from the Effects menu.
If you make these settings it should sound exactly like the four track delay above.
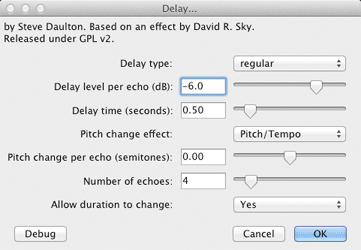
Click OK and listen.
Make two repeats of the waveform.
Reduce the second repeat by -6 dB.
Choose Apple: AUDelay from
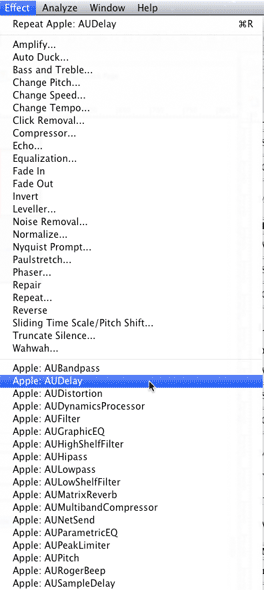
Make these settings.
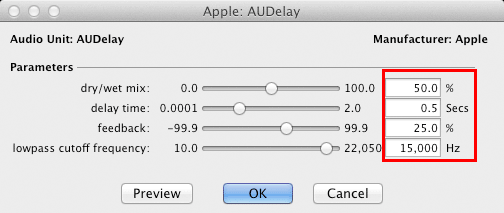
Preview or Click OK and listen.
Close the window.
If the tempo of the music sample is known you can calculate delay times that are proportional to the beat. In lab12_9 you'll create delays based on four divisions of a beat. If the beat was a quarter note, the delays would be sixteenth notes.
Open ViolinPizzSolo.wav in a new window.
The tempo of this melody is 120 beats per minute. That means a quarter note lasts for 500 milliseconds, an eighth note lasts for 250 ms, and a sixteenth note lasts for 125 ms. We're going to create a multi tap delay with four taps synchronized to the sixteenth note.
Create a total of four copies of this track.
Time shift each track to start at these times:
Solo the tracks in various combinations to hear different tempo sync delay patterns.
Pattern |
Solo These Tracks |
1 2 |
|
1 3 |
|
1 4 |
|
1 2 3 |
|
1 2 4 |
|
1 3 4 |
|
1 2 3 4 |
Close the window.
Room reverb works on the same principle as Echo Canyon but the delay distances are much smaller.
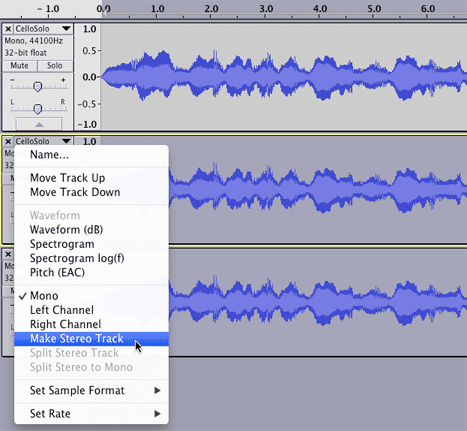
"Apple AU MatrixReverb AU MatrixReverb only outputs in stereo and needs a stereo track to work on, so cannot be used on a mono track. It seems to be the only one of the built-in Audio Units plug-ins that has this limitation. For a workaround, select the track by clicking in its Track Control Panel above the Mute/Solo buttons, then Edit > Duplicate. Click on the drop-down arrow in the Track Control Panel of the upper track > Make Stereo Track. After processing with AU MatrixReverb, click the arrow again > Split Stereo Track, click the arrow once more in the upper track and make it Mono, then delete the lower track by clicking on the [X] in the Track Control Panel." http://wiki.audacityteam.org/wiki/Audio_Unitshttp://wiki.audacityteam.org/wiki/Audio_Units
Open CelloSolo.wav in a new Audacity window.
Make a total of three copies of the track.
Select tracks 2 and 3 and choose Make Stereo Track from the Track Info panel popup menu.
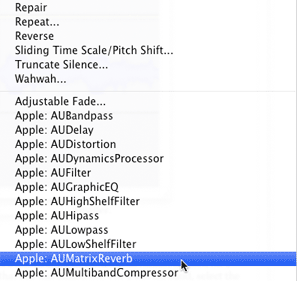
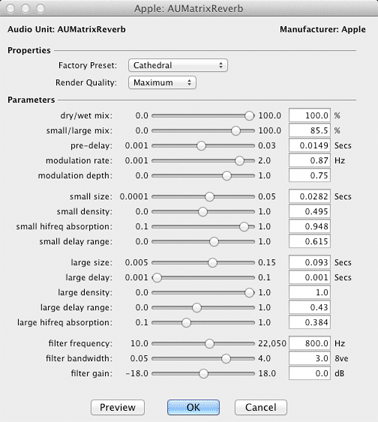
With the new stereo track selected choose AUMatrixReverb from the Effects menu.
Choose the Cathedral setting and click OK.
Choose Split Stereo Track from the Track Info Panel menu.
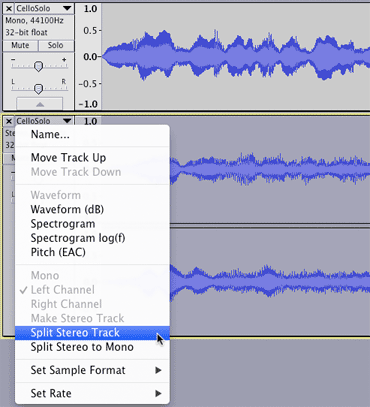
Delete track 3.
Track 2 appears to be softer (lower amplitude) than track 1. Let's make them the same.
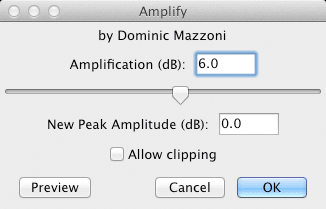
Select track 1 and choose Amplify from the Effects menu. This shows that track 1 would need to be amplified by 6.0 dB in order to reach a Peak Amplitude of 0 dB. In effect track 1 is at -6 dB.
DO NOT CLICK OK. Click Cancel instead. We're just looking.
Select track 2 and choose Amplify from the Effects menu. This shows that track 2would need to be amplified by 10.1 dB in order to reach a Peak Amplitude of 0 dB. In effect track 1 is at -10.1 dB.
DO NOT CLICK OK. Click Cancel instead. We're just looking.

Set either the Amplification to 4.1 dB or set the New Peak Amplitude to -6 dB and track 2 will match track 1 in volume.
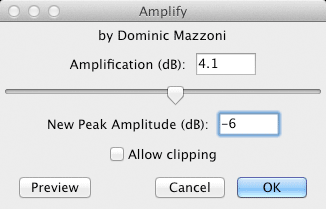
Click OK.
The visual amplitudes look the same.

Play both. Use the Mute Buttons to compare the reverb and amplitude effects.
Close the window.
Open Music108.wav in a new window.
Select the word one.
Type Z to find zero crossings.
Choose Repeat from the Effects menu and repeat the word one five times.
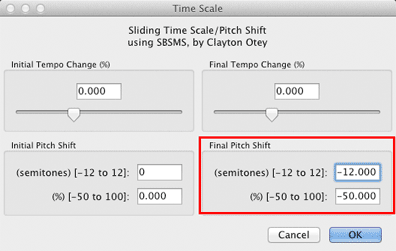
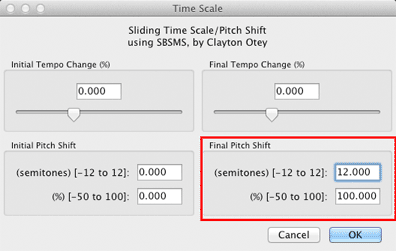
Select the first word one, type z, and choose Sliding Time Scale/Pitch Shift from the Effects menu and make these settings.
Leave the second word one as is.
Select the third word one, type z, and choose Sliding Time Scale/Pitch Shift from the Effects menu and make these settings.
Select the fourth word one, type z, and apply the Pitch Shift twice. Shortcut Apple-R twice.
Select the fifth word one, type z, and apply the Pitch Shift three times. Shortcut Apple-R three times.
Select the sixth word one, type z, and apply the Pitch Shift four times. Shortcut Apple-R four times.
Select the word eight, type z, t and apply these changes.
You may want to experiment with these effects for Take Home Quiz 2.
Plus any others that look interesting.
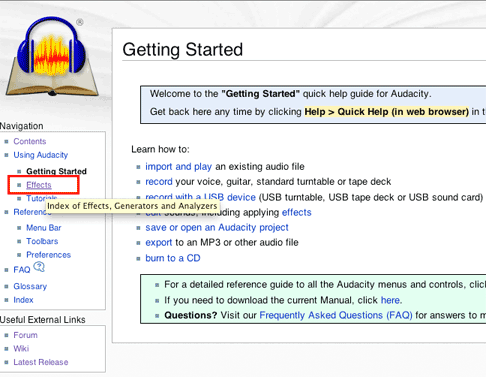
Choose Quick Help from the Help menu in Audacity.
Click the Effects link to show the help page for Effects.