"the tune was first published in 1811...The Frère Jacques tune is one of the most basic repeating canons along with the melody of Three Blind Mice. It is also simple enough to have spread easily from place to place. For example, Barbara Mittler in a conference abstract points out that the melody of Frère Jacques is so thoroughly assimilated into Chinese culture that it might be widely regarded as a Chinese folksong in China." http://en.wikipedia.org/wiki/Fr%C3%A8re_Jacques
In this lab you'll create a two part round with drum accompaniment.
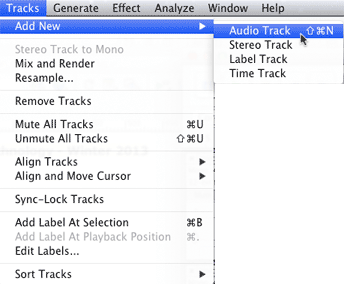
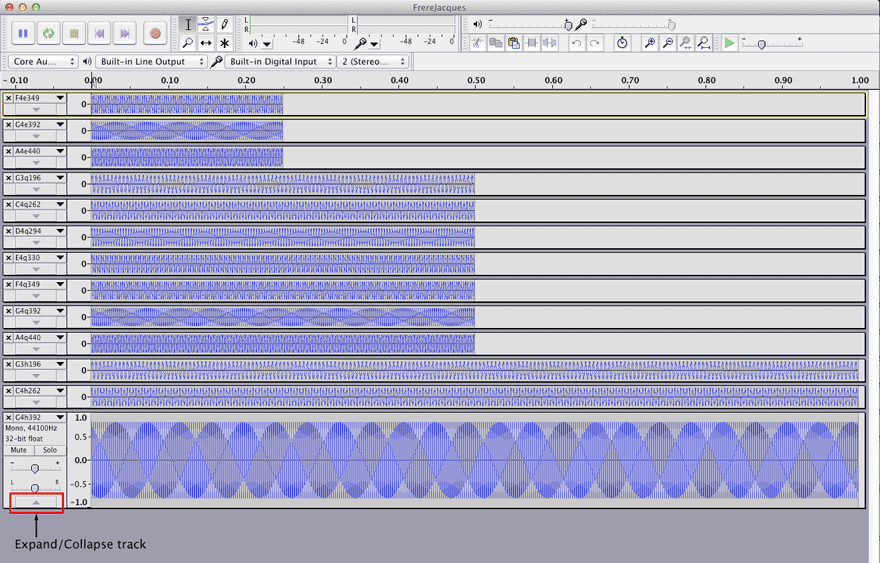
Create 13 new audio tracks using the shortcut Command-Shift-N.
Use the Track Info popup menu to name a track.
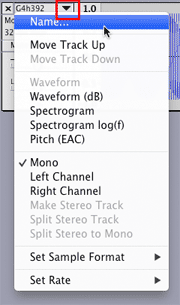
The track names are a concatenation of Pitch-NoteValue-Frequency.
| Name | Pitch |
Note Value |
Frequency |
Duration in milliseconds |
| F4e349 | F4 |
e (eighth) |
349 |
250 |
| G4e390 | G4 |
e |
390 |
250 |
| A4e440 | A4 |
e |
440 |
250 |
| G3q196 | G3 |
q (quarter) |
196 |
500 |
| C4q262 | C4 Middle C |
q |
262 |
500 |
| D4q294 | D4 |
q |
294 |
500 |
| E4q330 | E4 |
q |
330 |
500 |
| F4q349 | F4 |
q |
349 |
500 |
| G4q392 | G4 |
q |
392 |
500 |
| A4q440 | A4 |
q |
440 |
500 |
| G3h196 | G3 |
h (half) |
196 |
1000 |
| C4h262 | C4 |
h |
262 |
1000 |
| G4h392 | G4 |
h |
392 |
1000 |
Use the Frequency and duration shown above. Use an amplitude of 0.8.
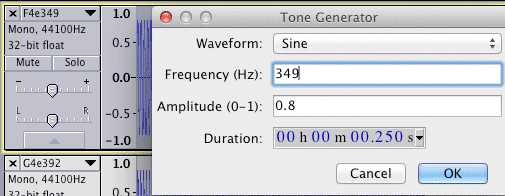
Play each sine wave as you create them.
You can expand/collapes track heights as needed.
Save As - FrereJacques .aup
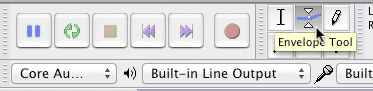
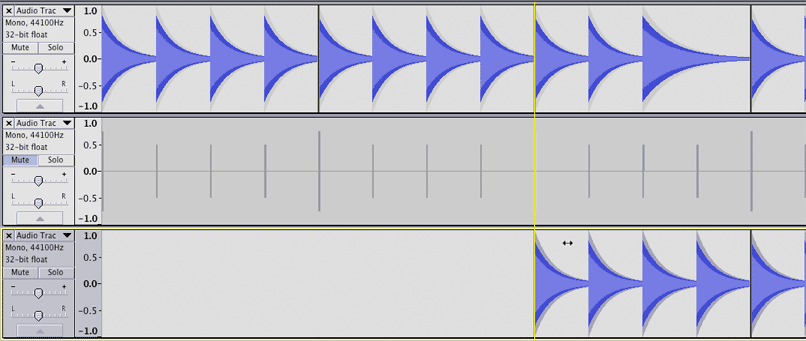
Use the envelope tool to shape the sound.
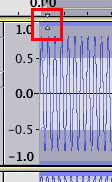
Click once at the left edge of the waveform and drag up to full amplitude.
Click once in to the right of that point, keep the mouse button held down, and drag to down and to the end of the waveform. Create an envelope shape that looks like this.
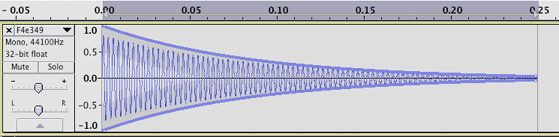
Create a similar envelope shape for all 13 notes.
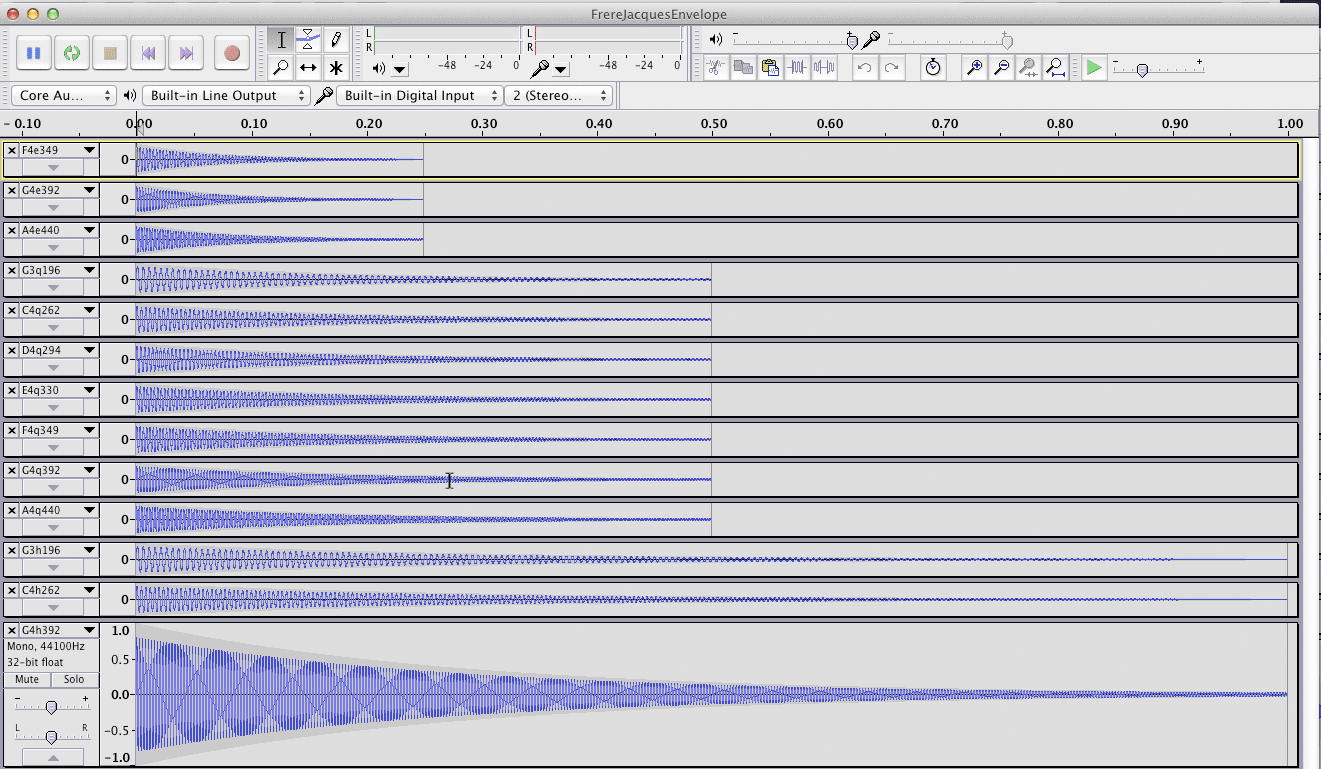
Save as FrereJacquesEnvelope.aup
Add a new audio track
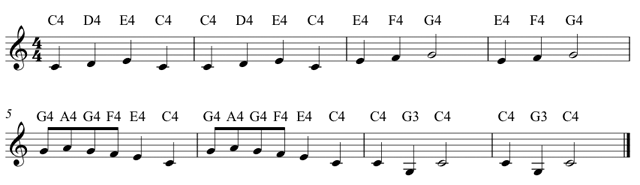
Copy paste notes to create this melody
| Measure | Beat 1 | Beat 2 | Beat 3 | Beat 4 |
| 1 | C4q262 | D4q294 | E4q330 | C4q262 |
| 2 | C4q262 | D4q294 | E4q330 | C4q262 |
| 3 | E4q330 | F4q349 | G4h39 | |
| 4 | E4q330 | F4q349 | G4h39 | |
| 5 | G4e39- A4e44 | G4e39- F4e349 | E4q330 | C4q262 |
| 6 | G4e39- A4e44 | G4e39- F4e349 | E4q330 | C4q262 |
| 7 | C4q262 | G3q196 | C4h262 | |
| 8 | C4q262 | G3q196 | C4h262 | |
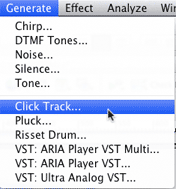
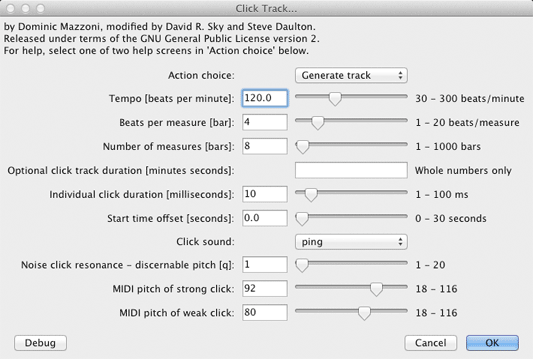
Adding a click track will help you positiong the notes accurately. Add a new audio track and choose Click Track from the Generate menu.
Because the melody is eight measures long and we've defined the quarter note length to be 500 ms, you'll need to make these choices.
Alternate between select tool and time shift tool.
| Select tool | |
| Time Shift tool |
Use the Select tool to copy single notes and position the paste point in the melody track.
Use the Time Shift tool to move a melody note region right or left.
When moving with time shift tool watch for yellow line that indicates region boundaries.
You should end up with this.
Solo the melody track and play it. It should sound like this.
Save as FrereJacquesVoice1.aup
When the Melody plays correctly you can delete the 13 individual note tracks leaving only the melody track and the click track.
Save as FrereJacques2PartRound.aup.
Copy paste, you know how.
Add a new audio track for voice 2 and paste the melody into voice 2.
Use the Time Shift tool to make voice 2 enter on measure three.
You should hear the two part round. However you'll hear disortion caused by clipping.
We have to reduct the amplitude of each track to avoid clipping. That's a job for the Normalize tool (or the Amplify tool).
Select entire Track 1.
Choose Normalize from the Effects Menu.
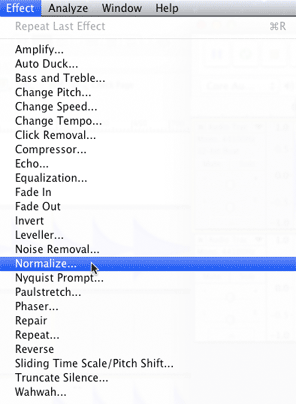
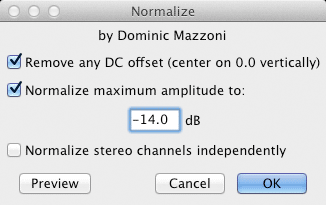
Make these settings.
Remove DC centers the waveform so there is equal amplitude above and below the horizontal axis.
Every -6dB change makes makes the sound half as loud. The -14 dB setting sounded good.
The waveform amplitudes are attenuated.
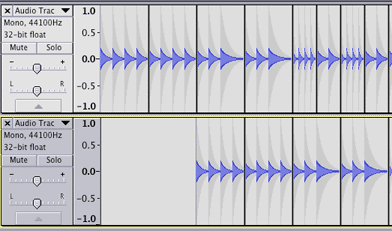
It should now play without clipping.
Add a new audio track.
Choose Risset Drum from the Generate menu.
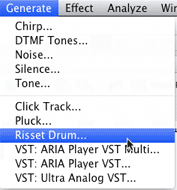
You'll see this dialog.
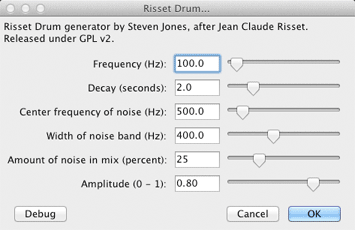
Click OK and play the resulting drum sound.
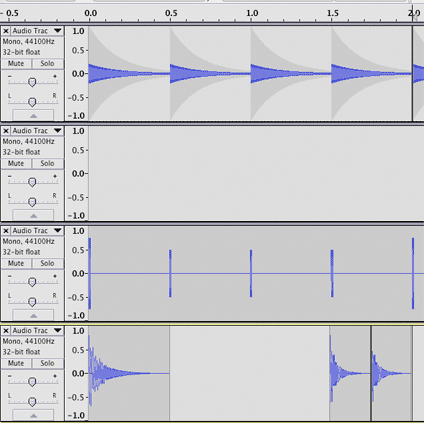
Experiment with the different parameters. For this example I used two different drum sounds.
1. 5oo ms decay time - lower frequency
2. 250 ms decay time - slightly higher frequency and lower amplitude.
I also chose a rhythm of quarter note - quarter rest - quarter rest - two eighth notes.
Your free to choose your own sounds and rhythms.
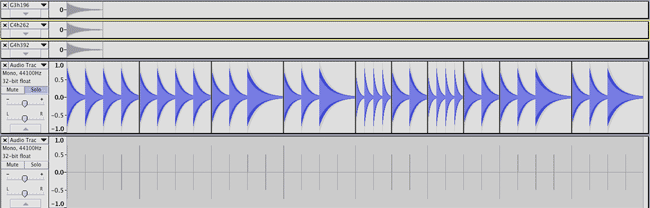
Create a one measure pattern lining up with a click track. I created a temporary two measure click track at a tempo of 120.
Copy and paste multiple times to the end of the song.
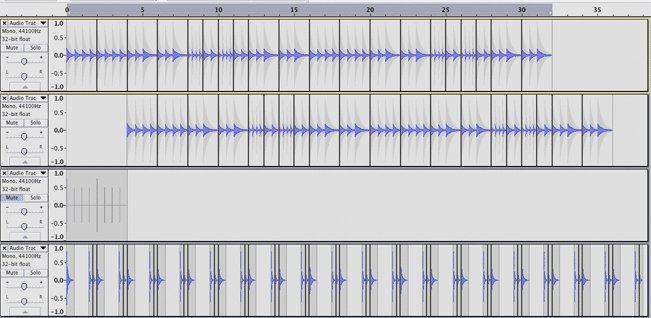
If it sounds OK you can delete the click track.
If the drums get off the beat you can create a 16 measure click track and use the Zoom tool and the Time Shift tool to line up the drums on the beats.
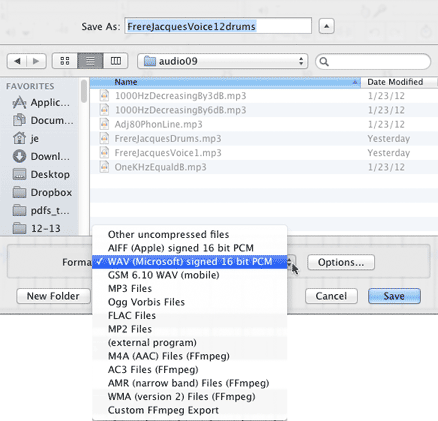
Wave files are higher audio quality than mp3 files but require more storage space.
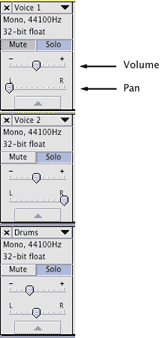
Adjust the Volume and Pan controls for each track. I set track one pan left, track to pan right, drums pand center. I also reduced the volume on the drums.
Choose Export from the File menu and select Wave or MP3 format.
Revised John Ellinger, January - September 2013