There are three methods to control dynamics in MIDI.
Use velocity to produce single note accents and rhythmic drive in each instrument. Higher velocities are used on the strong beats and lower velocities are used on the weak beats. Note velocity sometimes affects the timbre of a note. Modern sample libraries have multiple waveforms for each note depending on the velocity. A piano library may contain samples of each note six different dynamic levels from pp to ff and choose samples based on velocity. A string instrument might use velocity levels to change bowing styles. A trumpet might create a growl effect within a certain velocity range.
MIDI Expression Control (CC11) should be thought of as a local volume control for a single instrument that can be used to create crescendos and decrescendos. It can also be used to shape the swell and decay of a long sustained note.
MIDI Volume Control (CC7) should be thought of as the master volume control. It is used at the beginning of the song to set the initial balance between instruments.
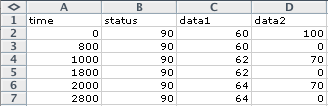
Copy the 03Lab5 data into 03Lab6 at A1. Paste the same data again at cell F1. Save the F1:I88 data for the Soprano line.
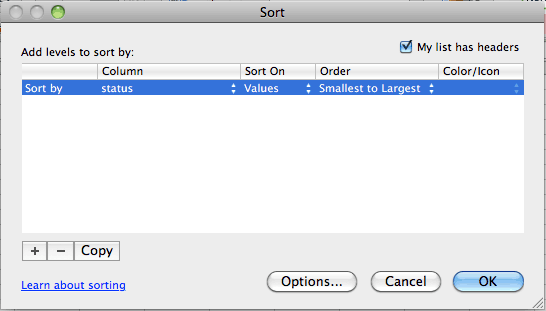
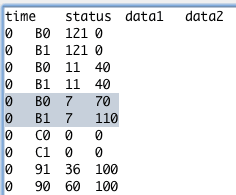
The bass line will play one octave lower on MIDI Channel 2, use a different instrument, and will be accented in threes. Sort the data in cells A1:D90 to separate the status messages.
Use velocity (data2 of NON messages) to create a triple meter rhythm: strong, weak, weak, for every three beats. Use the velocity of 100 for the strong beats, and a velocity of 70 for the weak beats. Setup the first three NON beats
Select and copy cells D2:D7.
Paste into D8:D59.
You'll need to change the Status bytes in column A. All 90's will become 91's. All B0's will become B1's.
Because there are 12 half steps in an octave, you can simply add or subtract 12 to change the pitch (data1) up or down one octave. Set up a formula in an empty column to transpose the data1 notes in column B two octaves lower. If you choose Column K as the empty column, click in cell K2 and enter the formula "=C2-24".
Copy K2. Select cells K3:K59, and paste. Select cell C2 and use Paste Special by Values to paste the new data1 values.
Copy all data in cells F2:I90 and paste into cell A91. The Bass track is in cells A2:D90 playing on MIDI Channel 2 ($9n and $Bn and $Cn where n = 1). The Soprano track is in cells A91:D179 playing on MIDI Channel 1 ($9n and $Bn and $Cn where n = 0).
You can do this beginning at row 180. You can sort everything later. For a start, set both Soprano and Bass to volume 100.
Patch Change messages are used to change instruments. MIDIDisplay can use any one of the 128 sounds specified in the "General MIDI Level 1 Sound Set" standard. The Patch Change message is one of a few MIDI messages that do note use a data2 byte. MIDIDisplay does it wrong. MIDIDisplay expects the $Cn message with a data 2 byte. Standard MIDI Files expect a Patch Change message without a data2 byte. The MIDIDisplay Help pages list all General MIDI instruments.
| Status Byte (n=channel) | Data1 |
$Cn |
Patch Number 0 - 127 |
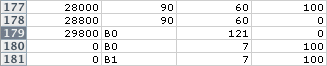
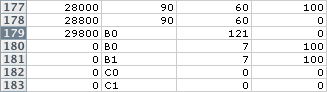
Let's start with both instruments set to the piano sound. GM number 0. Rows 182 and 183 show the patch change command.
Important: In the MIDI specification $Cn is a one data byte message. MIDIDisplay does it wrong and expects the data2 byte to be zero.
Sort A1:D181 into MIDIDisplay order. This time you'll need a three way sort.
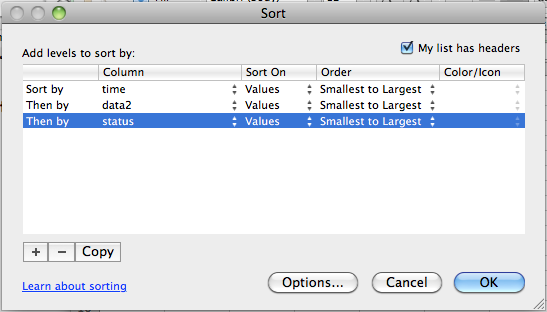
IMPORTANT: Make sure the Reset All Controllers messages ($Bn 121 0) are the very first messages.
Copy cells A1:D183. Paste the data into MIDIDisplay and click the Play button. Adjust the tempo as desired.
Make the bass louder than the soprano on the ascending portion of the scale and do the opposite on the descending portion of the scale.
You can do this by changing these two lines in MIDIDisplay. Copy these two lines.
Find the point in the in the data where the scale reaches its highest note and create a blank line. Set the blinking vertical cursor on that line and paste.
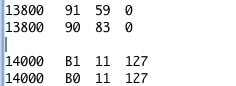
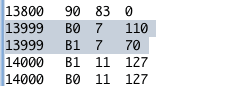
Switch the $Bn 7 data2 values so that channel 1 is 110 and channel 2 is 70. Adjust the time stamps to be just prior to 14000. Remove any blank lines.
Change the soprano and bass instruments. Open the MIDIDisplay help page from the Help menu. Click the General MIDI link, and scroll to the GM1 Instrument Patch Map section. Choose one instrument for the Soprano and another for the Bass.
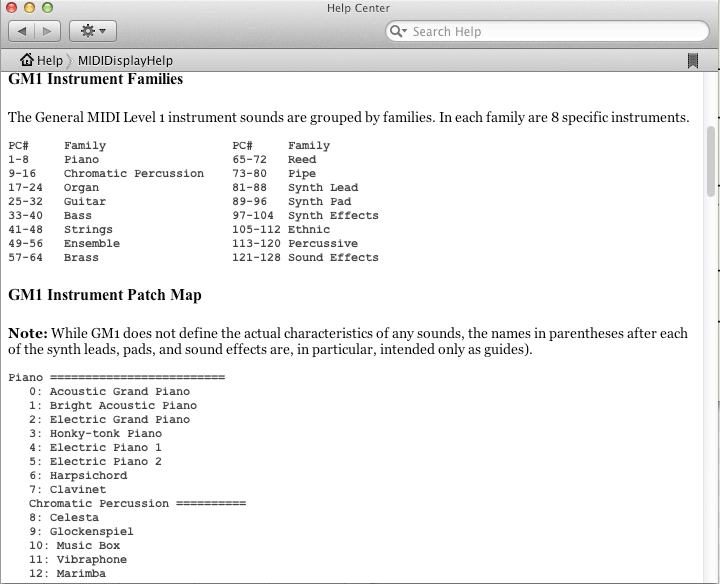
These commands would change the channel 1 to Honky-tonk Piano and channel 2 to Marimba.
![]()
Try inserting new patch changes at different places in the song. Be sure to put them before the first Note On message that you want to affect. If possible, adjust the time stamps for the $Cn message to be one less thatn the time stamp for the following NON message. When using chronological time, successive time stamps must either remain the same or increase. If the chronological times get out of order, MIDIDisplay may go into an endless loop.
Continue with 03Lab7.
Revised John Ellinger, January - September 2013