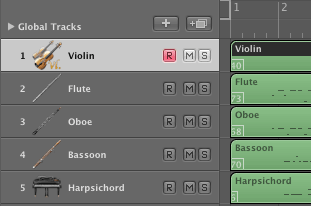
In this lab you'll perform many of the same operations you used in Excel and MIDIDisplay using the graphic and text tools available in Logic. Logic has several editors available. This lab will look at four of them: Lists Area, Piano Roll, Score Editor, and Hyper Editor.
Close the current project. Save if you want.
Open the LogicLab16_3.logic project you saved at the end of lab 2.
Select the Violin track.

The Lists Area displays all MIDI events in a track.

Click the Event tab.
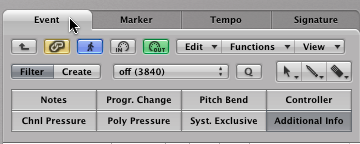
Note that Additional Info is selected.
The selected buttons seem to work in a counter intuitive way. Whatever is selected is not shown.
For example click Notes and all the NON and NOF messages will disappear.
You can change any data in the list columns by clicking and typing.

Click the Piano Roll tab at the bottom of the window.

The piano roll window appears.

Notes are shown by colored rectangles.
Pitch is indicated by the height on the piano axis.
Color indicates the velocity range. In this example all velocities are 100.
Start time is given by the left edge of the rectangle.
Duration is indicated by the length of the rectangle.
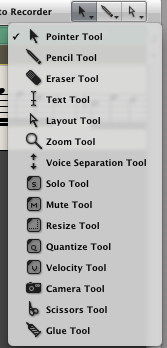
You can edit all of the above items directly in the Piano Roll view using tools from the Piano Roll tool menu. Shortcut: Esc key.

The Pointer Tool is used to change the start time, duration and position of the note.
Position the Pointer Tool over the left corner of the note. When the cursor changes shape drag to the new start time.
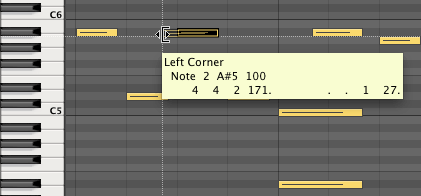
Position the Pointer Tool over the right corner of the note. When the cursor changes shape drag to the new duration.
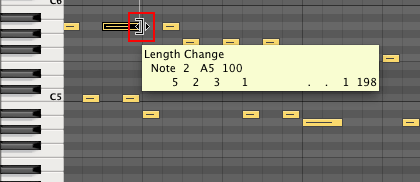
Position the Pointer Tool over the middle of the note. When the cursor changes shape drag to the new position.

Type the Esc key and choose the Velocity tool.
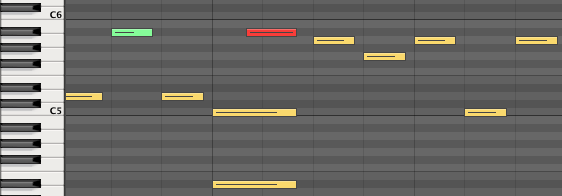
Click a note and drag vertically to change velocities. This velocity is being decreased by -32.

This velocity is being increased by +27.
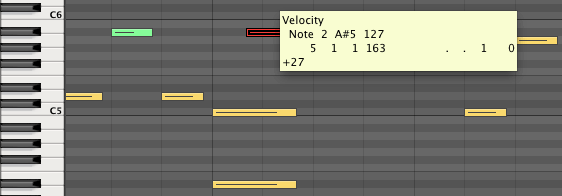
The colors indicate velocity ranges. The length of the bar inside the note represents the relative velocity as a proportion of the note length.
Click the Score tab at the bottom of the arrange window to display the score editor.
The score editor has its own tool menu.
The score editor is useful for quick pitch edits and velocity changes.
Open the Score window from the Window menu. Shortcut: Apple-3.
Click the HyperDraw icon at the lower left corner of the Score window.
![]()
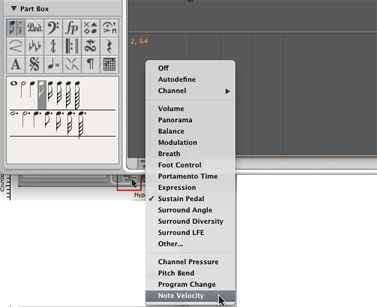
When the HyperEdit lane opens under the Violin score, right click to choose Note Velocity.
Let's adjust the velocities for a few measures of the violin so that beat one is the loudest, beat 3 is next loudest and beats 2 and 4 are softest. In this case beats refer to a group of four sixteenth notes.
Hold the Shift key down and click the note heads for every beat two and four. The note heads will turn green and the velocities in the HyperDraw lane will become highlighted.
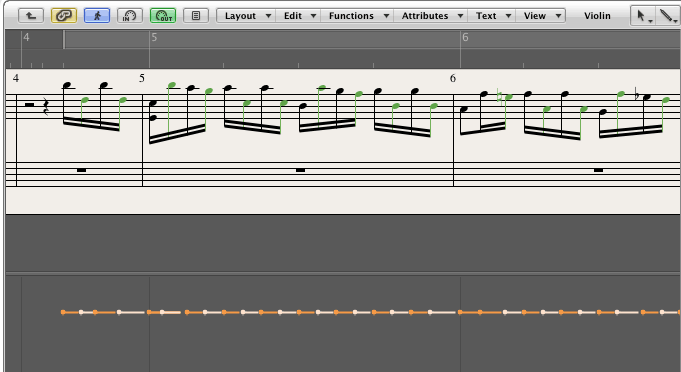
Carefully grab the first HyperDraw note velocity and drag them to a lower velocity value.
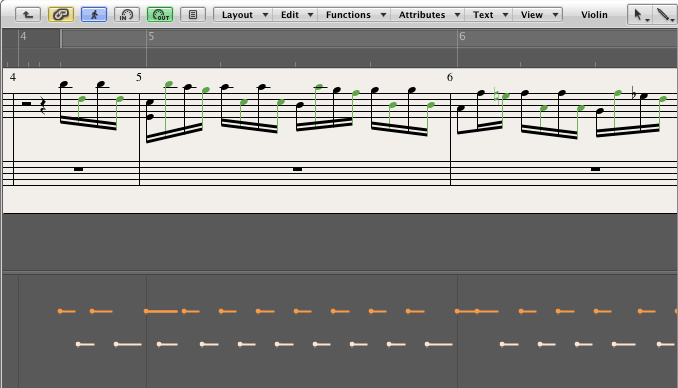
Select every note head on beat 3 of the sixteenth notes and drag those velocities lower than beat one, but higher than beats two and four.
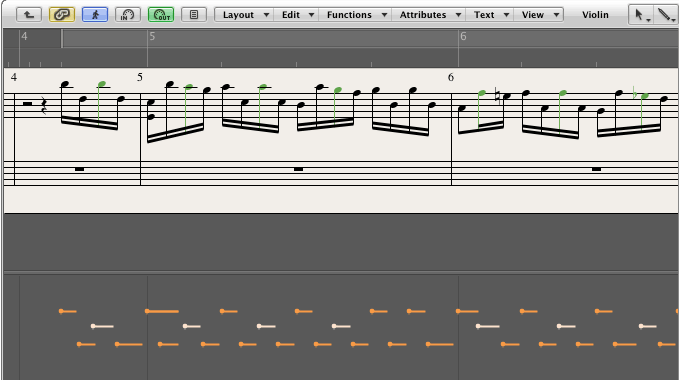
Play and listen.
The HyperDraw feature is also available in the Piano Roll editor.
Click the Hyper tab at the bottom of the arrange window to open the Hyper Editor. Because the Violin track is selected, you can see the velocity changes you just made in the All Velocities lane.
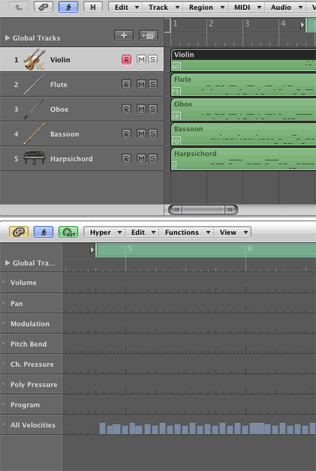
You're going to use the Hyper Editor to add Expression control messages to the Flute part.
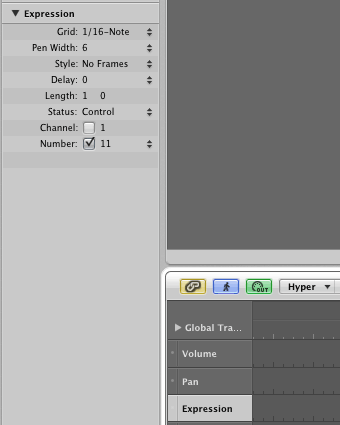
Select the Flute track and then select the Modulation lane in Hyper Editor.

In the Inspector Panel change the Number setting to 11, that's the control value for Expression.

Hyper Editor now displays Expression instead of Modulation.
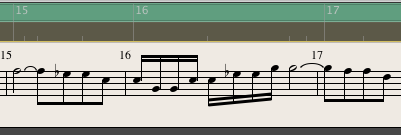
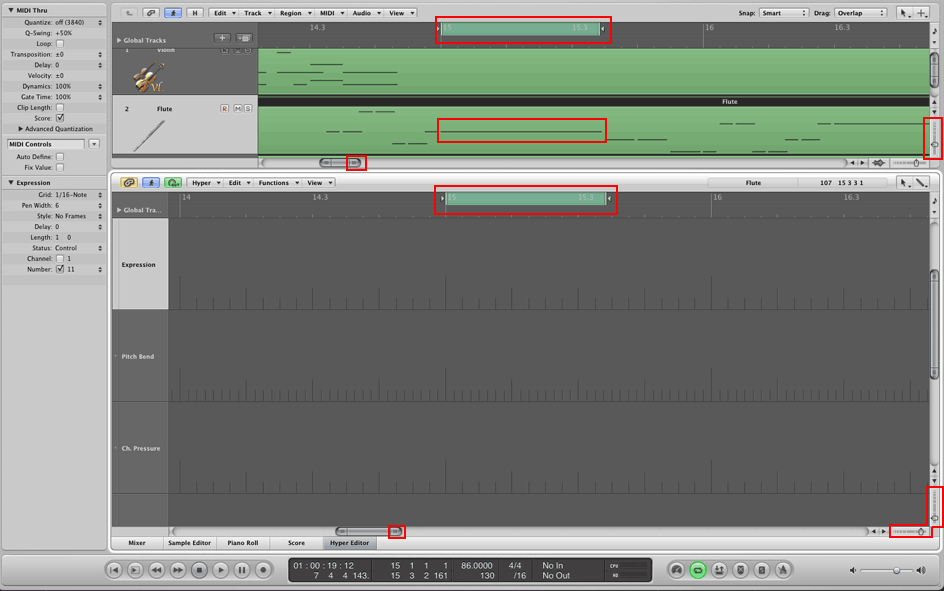
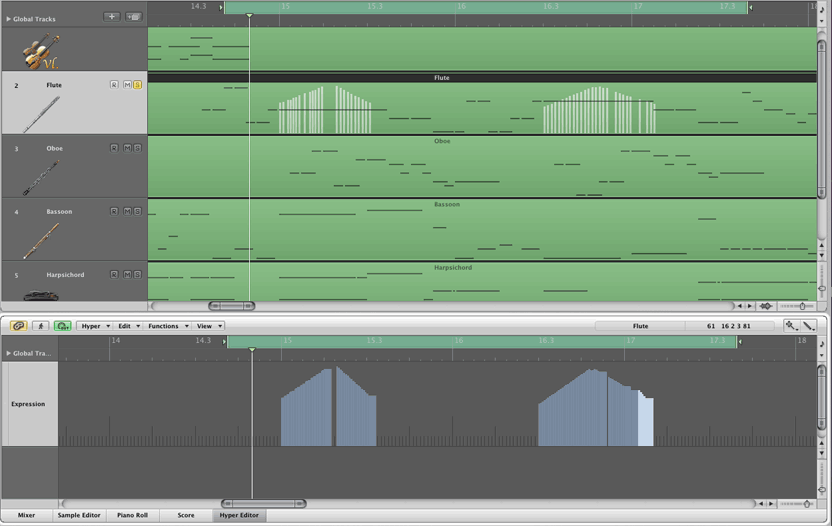
Use the vertical and horizontal zoom controls to get your display to resemble this picture. There are two long sustained flute notes in measures 15 and 17. You're going to use Expression to create a dynamic swell on these two long notes. The window layout is setup to work on the first note in measure 15.
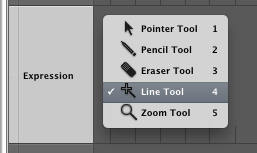
Use the line tool in Hyper Editor. Shortcut: Esc-4.
Draw the swells in the Expression lane. An image of the swells also appears in the track lane.
We're going to work with a small section of Vivaldi in this lab, measures 14-21.
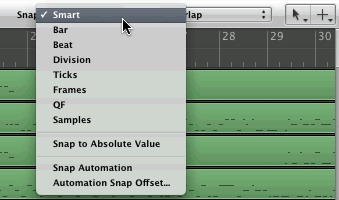
Set the Snap: popup menu setting to Smart.
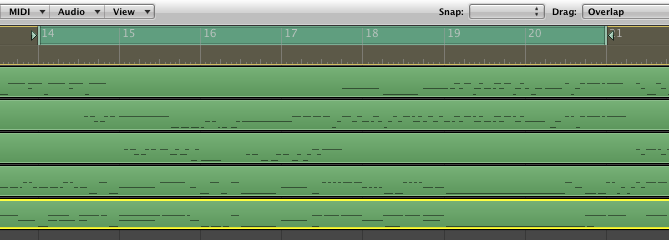
Drag across measures 14-20 above the MIDI tracks. The region should turn green. Logic requires you to drag left to right when creating regions.
The Loop icon in the Transport bar should be lit.
![]()
Select the harpsichord track in the Tracks Pane and Solo it.
Open the Piano Roll view.
Play the harpsichord track.
The durations are too long. Let's make them shorter.
First set the Division in the transport panel to 32 notes. Double click and type 32.

Choose Transform-Fixed Note Length from the Functions menu.
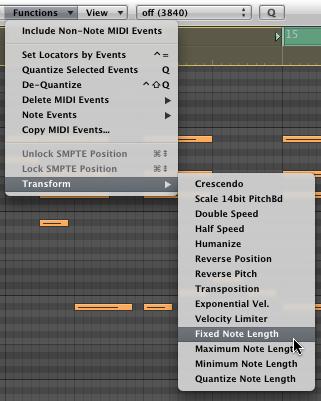
In the Transform menu make these settings.

That will fix all note durations to three thirty seconds or a dotted sixteenth note. It's three parts of the duration we just set to 32.
Click select and operate. Note that the Piano Roll shows the shortened durations.
An arpeggio is created when the notes of the chord are not played simultaneously but are slightly offset from one another.
Here's the first chord in measure 15 of the harpsichord as an arpeggio.

See if you can do this.
Hints.
Practice editing other instruments in measures 14-21 to create a realistic playback effect.
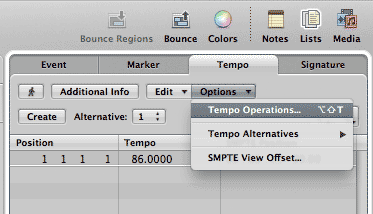
In the Lists Area panel select the Tempo tab.

Select Tempo Operations from the Tempo menu.
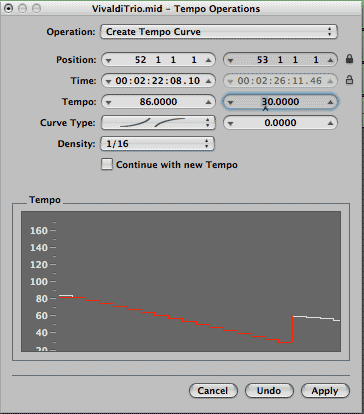
Make these settings in the Tempo Operations dialog and click Apply.
The tempo changes will be written to the Tempo panel.
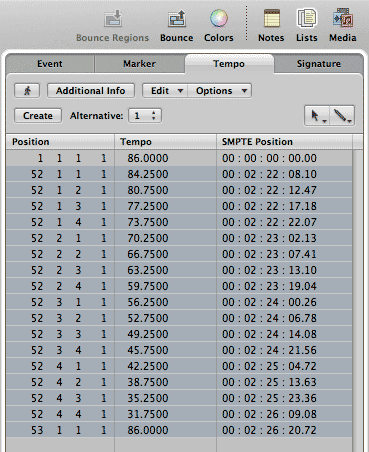
Play Measures 50-54 and listen to the ritard.
Revised John Ellinger, January - September 2013