Select track 5 "Pop String Ensemble" in the Track list.
Drag the green MIDI track to track lane 5.
You should see the window for EXS24 software synth opened to the "Full Strings Legato" patch.
Your MIDI track may or may not sound good. If you have short quick notes in your MIDI track the patch will not have enough time to build to a sustained sound and will get cut off prematurely.
Try playing some long sustained notes on the MIDI Controller to hear the full sustained tone of the strings.
So far we've been looking at Logic Instruments. Logic also has a number of high quality effects like EQ, Reverb, Compression, Delay, Filters, etc.
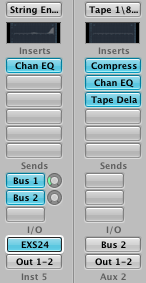
The effects used in this patch are shown in the Inspector Panel.

From top to bottom.
String Ensemble
Channel EQ was used as an insert effect.
There are two Sends called Bus 1 and Bus 2
I/O stands for Input / Output.
The MIDI output is input for the EXS24 software Synth
The EXS24 is sent to outputs 1-2, the computer speakers or headphone jack.
Inst 5 (at bottom)
From top to bottom.
Tape 1\8...
Compression, Channel EQ, and Tape Delay were used as an insert effects
There are no sends
I/O stands for Input / Output.
The is input is coming from Bus 2
The output is sent to outputs 1-2, the computer speakers or headphone jack.
Aux 2
There are several terms you need to be familiar with.
An insert is a DSP effect.
A global insert (usually put in the output track) affects all tracks. Global effects are shown only in the Mixer.
A channel insert affects only a single track. Channel inserts are shown in the Inspector Panel and the individual track in the Mixer.
Bus and Aux are sends. They work in pairs. A Bus sends signals to an Aux, and Aux receives signals from a Bus. You have 64 to work with.
Bus and Aux are used to create different routing possibilities within the Mixer.
For example, if you want to use single reverb on multiple tracks it is more efficient to nsert the reverb on the Aux track and set it's input to a Bus, say Bus 1.
Then you can use the Bus 1 Send on multiple tracks and vary the amount of reverb assigned to each instrument. Different amounts of reverb can create a sense of stage depth.
There is a volume meter, a volume slider, a pan knob, a solo button, and a mute button at the bottom of each column.

The controls are linked to the the Mixer.
Click the Mixer tab towards the bottom of the window.

Drag the Sizer strip (circled in red) vertically until you've reached the height of the mixer controls.
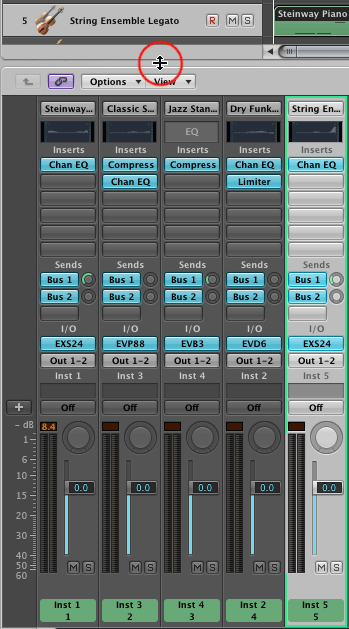
There's a lot of instruments in the Mixer window.
To view only our current instrument 5, String Ensemble Legato, click the Single button in the Mixer toolbar.

The Mixer will only display the MIDI tracks, Aux tracks, and Output tracks that are related to the currently selected instrument.
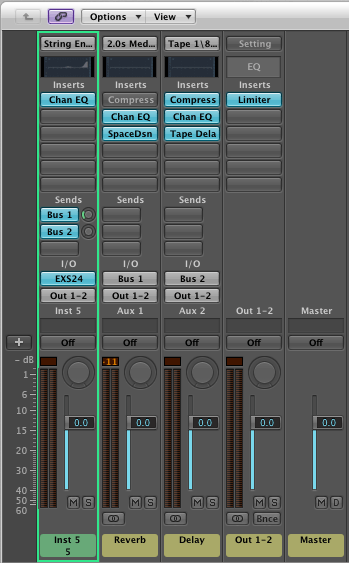
Play some notes on your MIDI controller and watch the level meters respond.
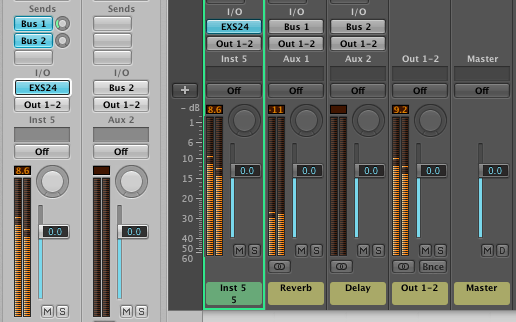
In order to see which Aux track receives Bus 1, click and hold the blue Bus 1 button in the Inspector panel. A popup menu will appear showing you that Bus 1 sends to the Reverb Aux track.
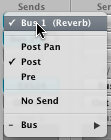
Let's increase the amount of Reverb.
Click and drag vertically to change the Bus 1 send amount.
![]()
Play notes on your MIDI controller.
Can you hear a difference?
If you look at the Mixer Channel Strip for the Reverb Aux Track, the Reverb effect is called SpaceDesigner.

Change the Preset from "2.0s_Medium Hall" to "03.0s Long Reverb."
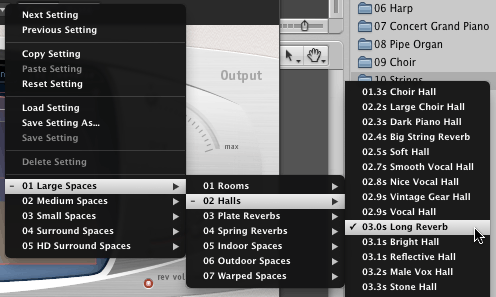
Set the Bus 1 send about to 100%.
Play some notes on your MIDI Controller.
Press the compare button to compare the current setting to the previous setting.
Press the Bypass button to hear the samples with no reverb.
Press the previous and next triangles to change to a different preset in menu order.
![]()
Enough.
Continue with Lab13-6LiverpoolBass
Revised John Ellinger, January - September 2013